Let’s Start the Week with a Painterly Pears Suite Project
Let’s Create a Handmade Stepper Card using Painterly Pears Suite 🌟
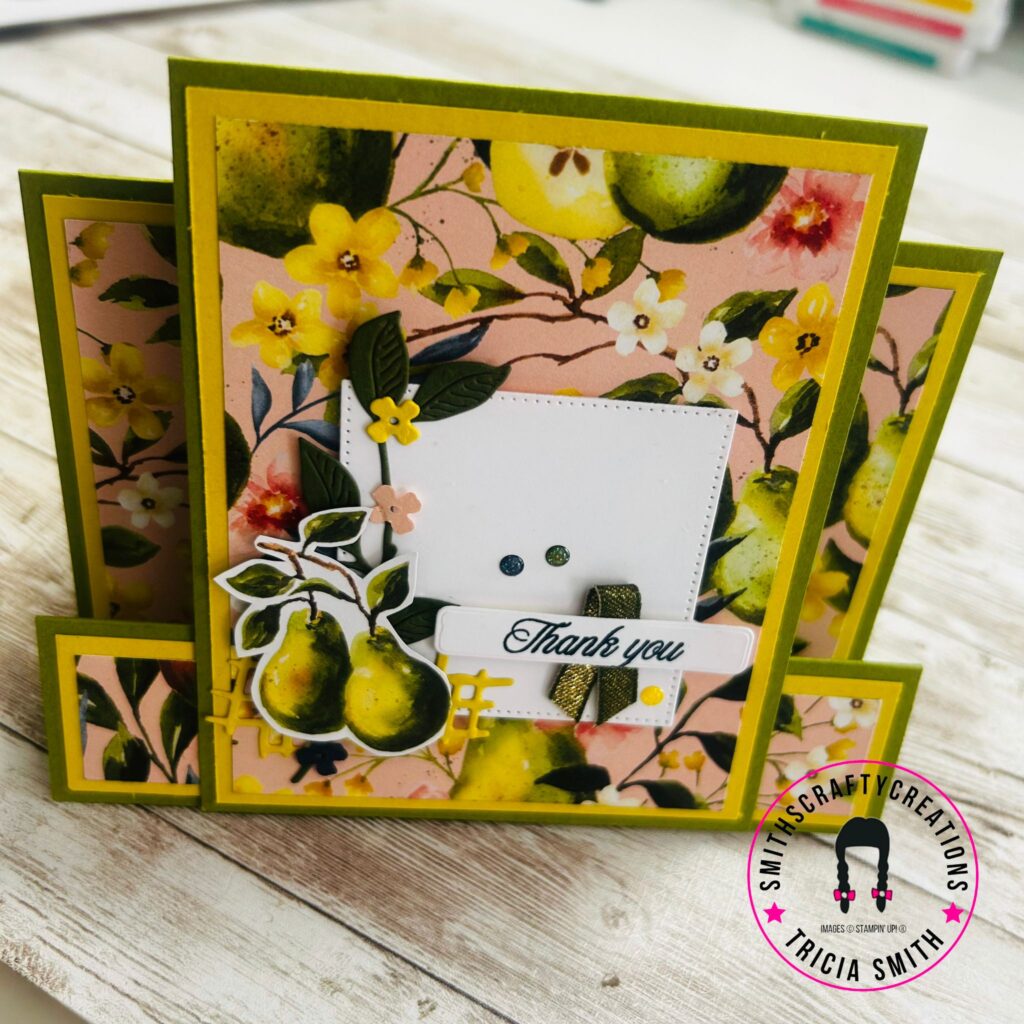
Today I am sharing this wonderful (and easy to make) Stepper Card! 💌 This delightful project is perfect for both beginners and experienced crafters alike, offering impressive results with surprisingly simple techniques.
This Week’s Featured Collection: Painterly Pears Suite 🍐
Throughout this entire week, I am focusing on the stunning Painterly Pears Suite Collection. Furthermore, this suite presents a delightful array of pear-inspired patterns that will enchant any papercrafting enthusiast. The collection beautifully showcases delicate blossoms 🌸, luscious fruit 🍐, and graceful leaves 🍃, all rendered in a soft, sophisticated palette that brings elegance to every project.
The Perfect Colour Harmony 🎨
The colour focus for this suite includes an exquisite selection: Basic Beige, Calypso Coral, Darling Duckling, Lemon Lolly, Mossy Meadow, Old Olive, Pecan Pie, Petal Pink, and Secret Sea. 🌈 Consequently, you’ll have a fantastic range to choose from when coordinating with your colouring and cardstock selections. This versatile palette ensures that every project feels cohesive and professionally finished.
Complete Crafting Arsenal 📦
Moreover, the suite contains everything you need for comprehensive papercrafting: stamps, dies, Designer Series Paper (DSP), ribbon, and embellishments. ✂️🎀 This complete collection guarantees that your projects will have that polished, coordinated look that makes all the difference.
While you’re here, browse my online store for all your Stampin’ Up! needs.

Supplies Needed
Painterly Pears Suite Collection
Old Olive Cardstock
Darling Duckling Cardstock
Night of Navy Ink Pad
Old Olive Ink Pad
Neutrals Stampin’ Write Markers
Multipurpose Adhesive
Stampin’ Up! Trimmer
Basic crafting tools (tear n tape, shammy, snips)
Dimensionals
Wink of Stella (must have!)
Step-by-Step Instructions:
Creating Your Beautiful Stepper Card: A Step-by-Step Tutorial 📏✨
Today I’m excited to share this wonderful stepper card technique that creates such impressive dimension with surprisingly simple construction! Let’s dive into the materials and methods needed to craft this stunning project. 💌
Gathering Your Materials 📦
Before we begin crafting, it’s essential to prepare all your materials. Moreover, having everything measured and ready will make the assembly process much smoother and more enjoyable.
Stepper Section Components 🔧
First, let’s prepare the stepper mechanism that gives this card its unique interactive element:
- Cardstock base: measuring 6 x 11 inches, with the long side positioned at the top—score at 4″, 8″, and 9½”
- Cardstock mats: one measuring 5¾” x 1¼” and one measuring 5¾” x 3¾”
- DSP mats: one measuring 5½” x 1″ and one measuring 5½” x 3½”
Card Top Section Elements 💳
Next, we’ll focus on the main card components that will house our beautiful design:
- Cardstock base: measuring 4 x 10 inches, with the long side positioned at the top—score at 5″
- Cardstock mats: two pieces measuring 4¾” x 3¾” (importantly, use one piece in white for the back of your card)
- DSP mat: measuring 4½” x 3½”
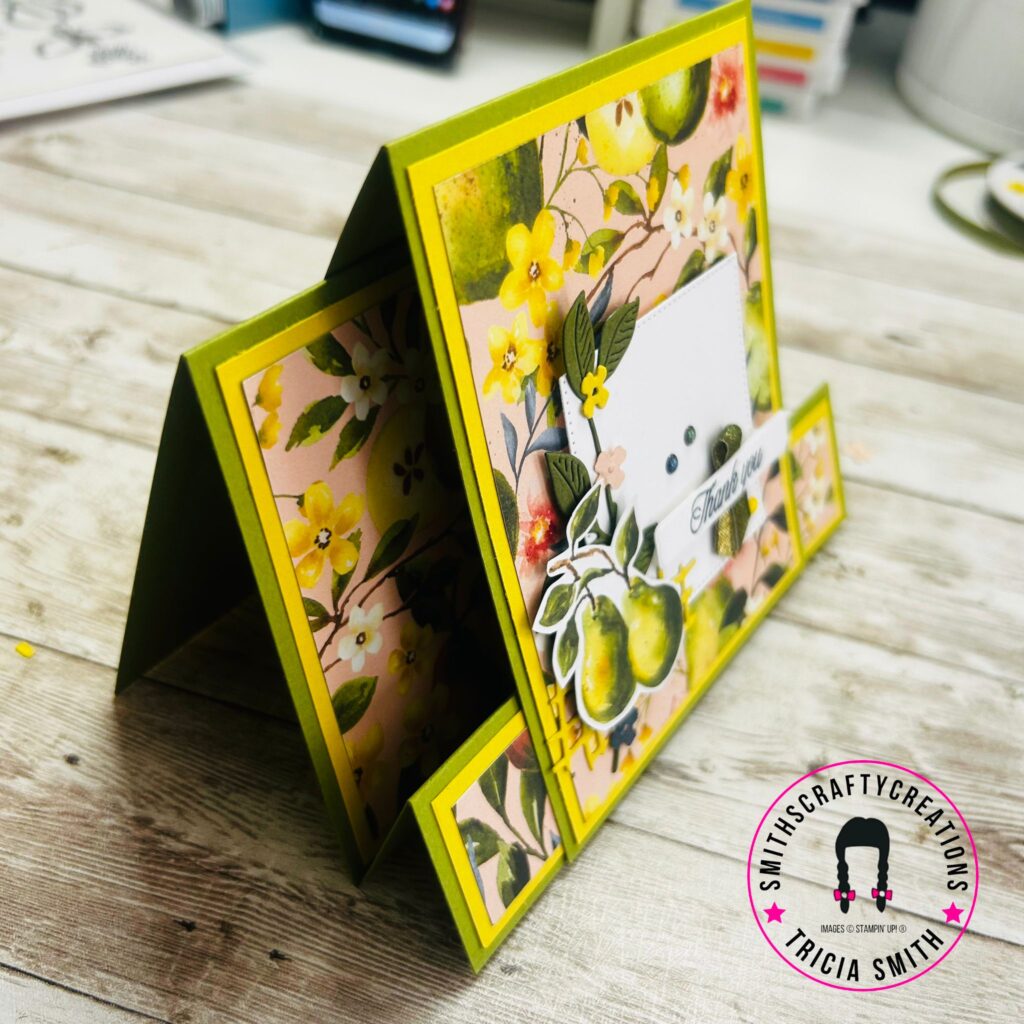
Assembly Process: Bringing It All Together 🎯
The assembly stage is wonderfully straightforward and rewarding! Furthermore, this technique allows for beautiful layering that creates professional-looking results.
Adhering Your Elements 🔗
To begin the assembly:
- First, carefully adhere the mats to your stepper section, ensuring precise alignment
- Subsequently, attach the corresponding mats to your card base
- Finally, take time to press each layer firmly for secure adhesion
Adding Those Perfect Finishing Touches ✨
This is where your creativity truly shines! The decoration phase allows you to personalise your stepper card and make it uniquely yours.
Creative Decoration Ideas 🎨
For the decoration process, consider these delightful options:
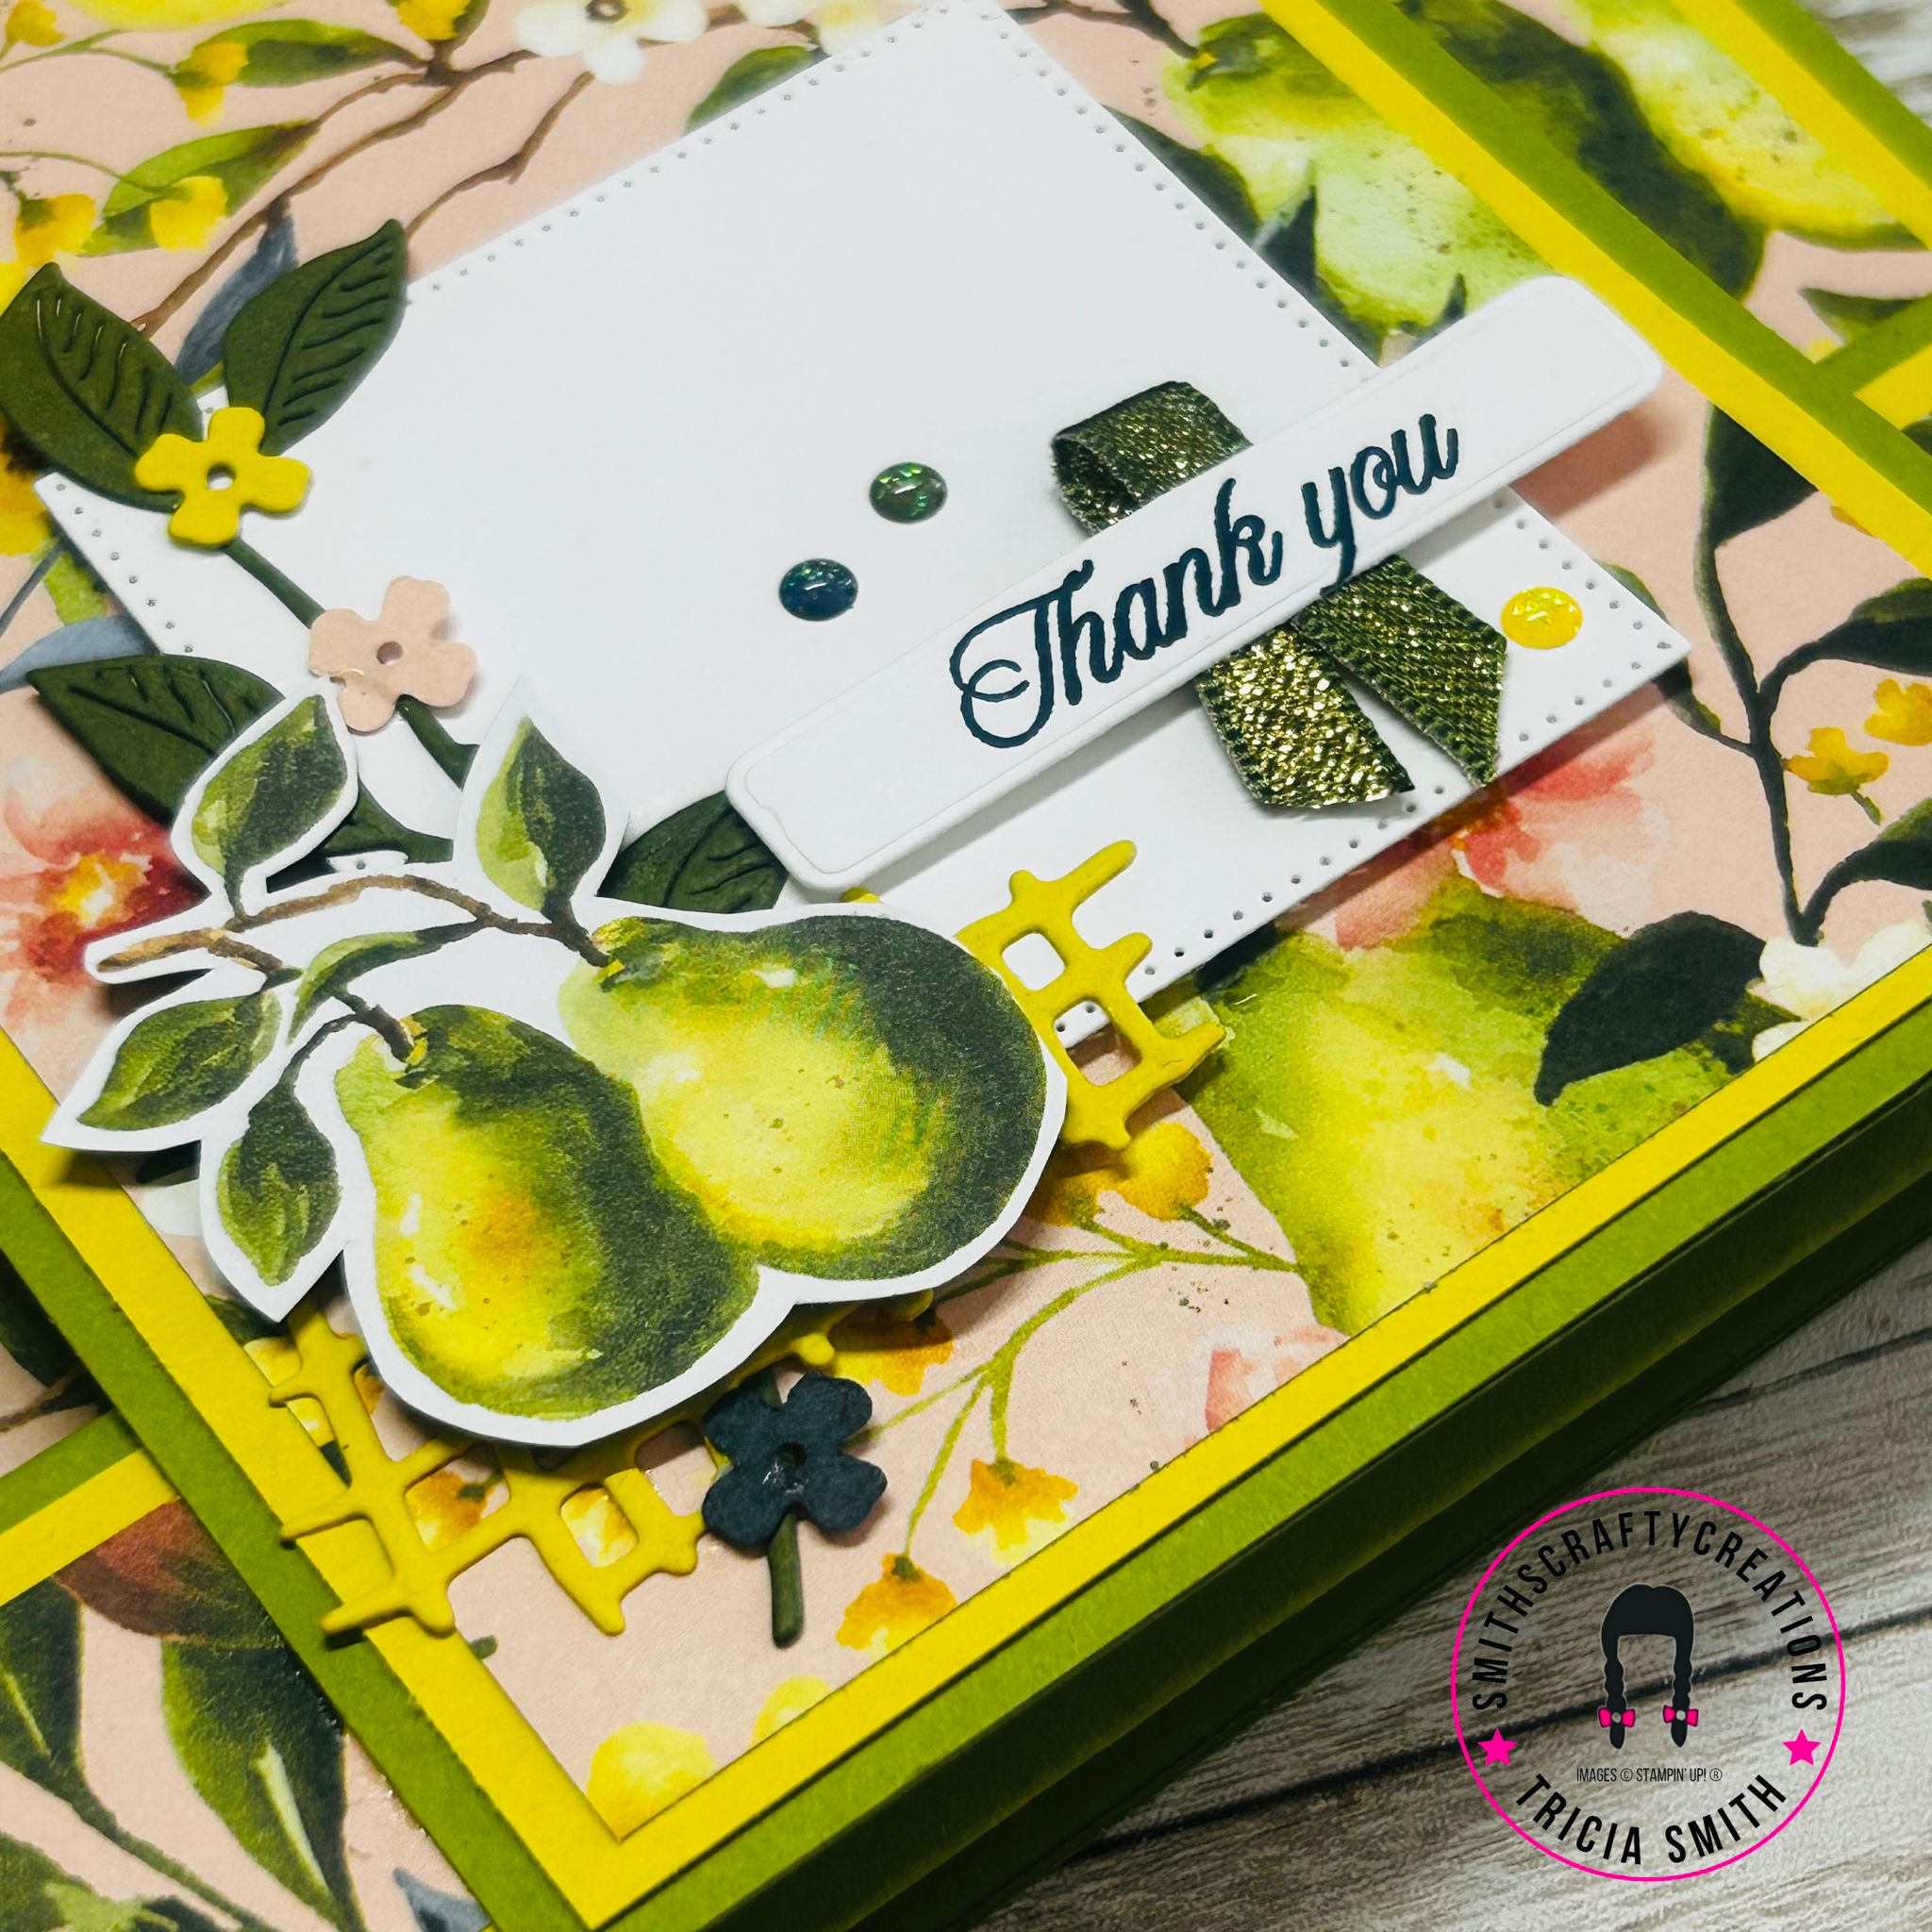
- Stamp your chosen sentiment on your card topper or die cut label to add a meaningful message
- Incorporate fussy-cut images from your Designer Series Paper for added visual interest
- Add die-cut elements to create beautiful dimensional layers
I particularly love using fussy-cut images from the DSP alongside coordinating die-cut elements, as this combination creates a rich, layered look that’s absolutely stunning! 🌟
The Final Result 💕
Once completed, your stepper card will feature beautiful interactive movement that delights recipients whilst showcasing your crafting skills. This technique is perfect for special occasions, thank-you notes, or simply spreading joy through handmade creativity!
I will be creating more projects using this suite throughout this week.
Have a look at the full suite in image below – it’s beautiful! Click the image to be redirected to my Stampin’ Up! store front for full details of contents of suite.
🎉 EXCITING NEWS! 🎉 Don’t forget that you earn your own rewards on every order £20+ or more! 💰✨ You can use them on your next online order OR save them up for a bigger treat later on (must be used within 12m of earning) 🗓️💎.
🌟 Shopping with Stampin’ Up! just got a little more REWARDing! 🛍️💫 Through our amazing Stampin’ Rewards programme, you can earn fantastic rewards on ALL your online orders then redeem them however you like! 🎁🙌
💡 Want that big-ticket item you’ve had your eye on? Save up your rewards and make it yours! 👀💕 Or prefer to treat yourself to a few goodies here and there to build up your craft stash? Perfect! 🎨📦
It’s as simple as: SHOP 🛒 ➡️ EARN 💰 ➡️ REDEEM 🎉
Start collecting those rewards TODAY and watch your crafting dreams come true! 🌈✨
Read more by clicking the image below! 👇📸

INCREDIBLE STARTER KIT OPPORTUNITY!
💰 The Starter Kit offers AMAZING value for new demonstrators – choose £130 worth of gorgeous products for just £99! 🎉 That’s £31 of FREE crafting goodies! 🎁✨
🤔 Whether you’re excited about building a thriving business 📈 or simply want to enjoy fantastic demonstrator discounts on your favourite products 💕, Team Smithy and the #SmithysStampers family would absolutely LOVE to welcome you with open arms! 🤗💜
🌱 We ALL started somewhere – let us be YOUR somewhere and share this incredible creative journey with you! 🎨🌈 From first-time crafters to seasoned pros, we’re here to cheer you on every step of the way! 📣
🚀 Ready to begin your Stampin’ Up! adventure? I’m practically bursting with excitement to see what treasures you choose for your kit and the AMAZING creations you’ll make! 🎭✨
🎯 Ready to join our fantastic team? Click the button below to get redirected, or reach out for a friendly, no-pressure chat! ☕💬
❓ Got questions? Click “Join My Team” in the menu above for all the answers! 📋
Your crafting adventure awaits! 🌟🎉

Need a catalogue?
Email me at smithscraftycreations@gmail.com, connect on social media, or click any of the images below to view digital catalogues online. Remember to have a notebook and pen nearby to note down all those items you wish to order / add to your wish list.


Thanks for visiting Let’s Start the Week with a Painterly Pears Suite Project Post
I hope you enjoyed this blog and it encourages you to take some time to be creative time this week.