Welcome to today’s cardmaking blog! 👋 I’ve gone with a fancy fold today and this one is called the Pillar Card. I changed the measurements from the last one I made because I wanted it to be 6×6 when folded flat for posting. 📮
🛍️ Materials You’ll Need
- Pool Party Cardstock – 124391 💙
- White Cardstock – 166781 🤍
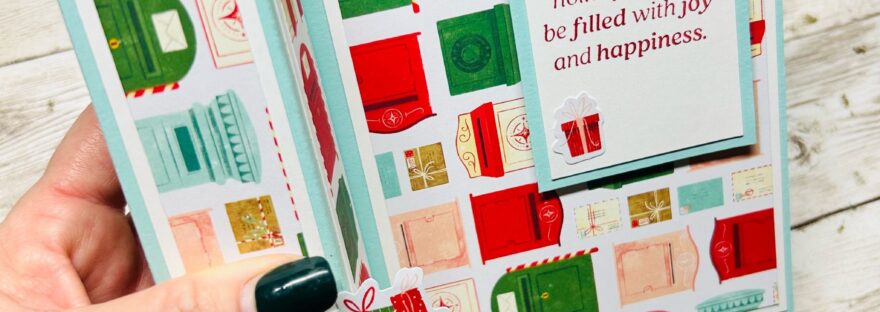
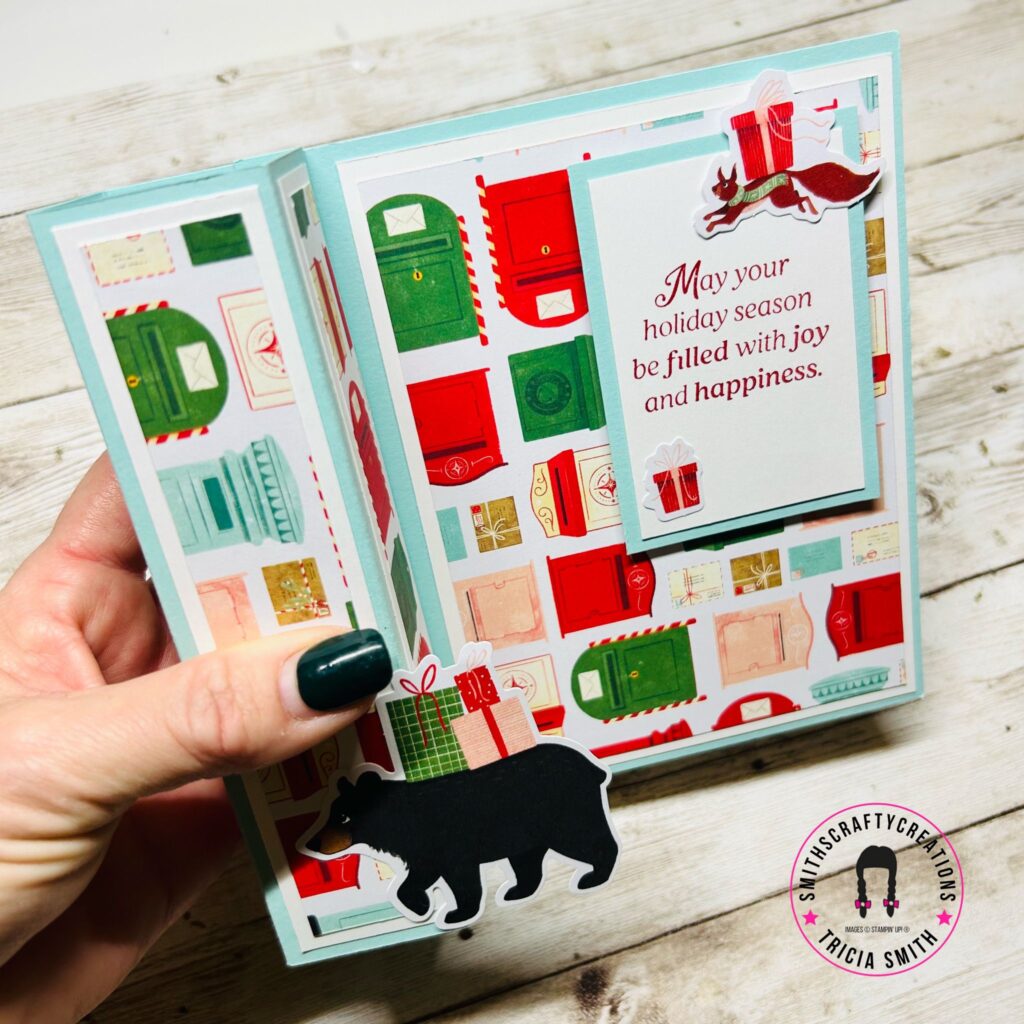
- North Pole Delivery DSP – 165837 🎄
- Words for the Season Stamp Set – 165716 ✍️
- Real Red Ink Pad – 147084 ❤️
- Stampin’ Up! Trimmer – 152392 ✂️
- Stamped fussy cut images OR Die cut printed pop out images 🖼️
📐 Measurements
Main Card Pieces
- Card Base – 11″ x 6″
- White Mat Layer – One at 4-1/4″ x 5-3/4″
- White Mat Layers – Three at 1-1/4″ x 5-3/4″
- DSP Mat Layer – One at 4″ x 5-1/2″
- DSP Mat Layers – Three at 1″ x 5-1/2″
Inside Card Pieces
- Colour Mat Layer – 2-1/4″ x 3-1/4″
- White Mat Layer (for stamping) – 2″ x 3″
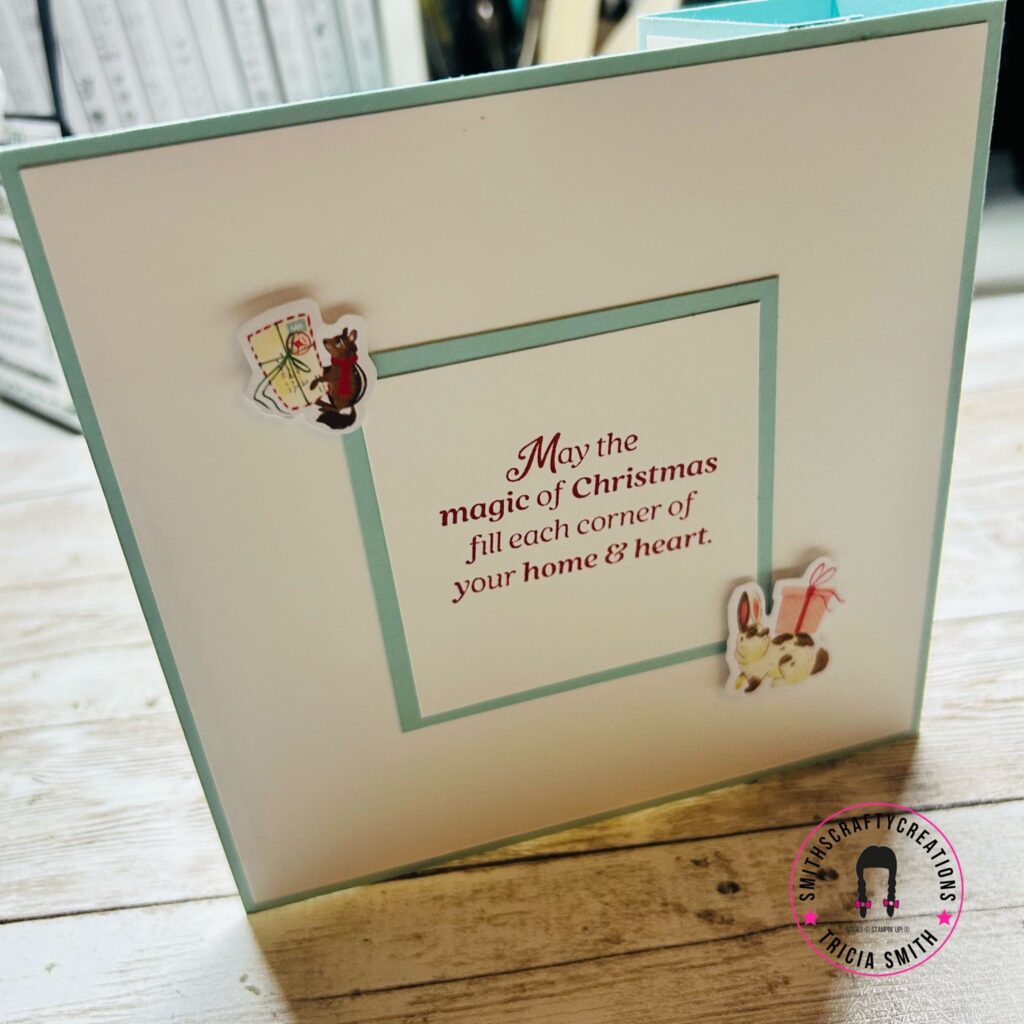
Back of Card Pieces
- White Mat Layer – 5-3/4″ x 5-3/4″
- Colour Mat Layer – 3″ x 3″
- White Mat Layer (for stamping) – 2-3/4″ x 2-3/4″
📝 Step-by-Step Instructions
- Prepare Your Card Base: Cut your card base down to 11″ x 6″. ✂️
- Score Your Card: Place the card horizontally on your trimmer/scoreboard and score at 1/2″, 2″, 2-1/2″ and 5″. 📏
- Fold and Burnish: Carefully fold along all score lines and burnish for crisp folds. 👌
- Adhere Cardstock Mats: Attach all of your cardstock mats to each panel, taking care to remember that the three smaller panels need to be adhered to the reverse side. 💡
- Add DSP Layers: Now add your designer series paper layers on top of the cardstock mats. 🎨
- Form the Pillar: Create the pillar shape and adhere in place to give your card its unique dimensional look. 🏛️
- Add Sentiments: Stamp your sentiments using the Words for the Season stamp set and Real Red ink. Adhere these to the cardstock mats before attaching to your card inside and back. Note: For the inside, I placed the sentiment in the top right corner so it’s visible when the card is opened. ✨
- Attach Decorative Elements: Add your images, fussy cut designs, or die cuts to the front of the pillar and also on the back of the card for a complete, polished look. 🌟
The Finished Card
This beautiful pillar card folds completely flat to a 6×6 size, making it perfect for mailing in a standard square envelope!
I do hope that you give this design a try and let me see your creation! This fancy fold is sure to impress your card recipients with its clever construction and dimensional display.
Join Our Crafty Community! 👥💕
Looking for inspiration, friendship, connections, and community spirit? Come and join my Facebook Crafty Group at https://www.facebook.com/groups/craftystampingclub where we share ideas, support each other’s creativity, and celebrate our love of all things papercrafting! 🎉✨
Ready to Get Crafty? 🛍️✨Over to You…
If you’d love to try out the Peaceful Days or Stay Warm stamp sets for yourself, pop over to my online store at smithscraftycreations.stampinup.net to browse these gorgeous products and so much more! Happy crafting! 🎨💕
Join My Team! 🌟💼
Have you ever considered turning your crafting passion into something more? I’d love to have you join my team! With an unbelievable offer of just a £35 starter kit, you can begin your Stampin’ Up! journey and enjoy fantastic benefits, discounts, and the opportunity to be part of an amazing creative community. Find out more and join today at smithscraftycreations.stampinup.net/join_now/ 🎁✨
Remember: You ARE creative. You’ve always been creative. Now go prove it to yourself! 💖
Ready to Join My Crafting Family?
Crafting and community go hand in hand at Stampin’ Up! I will be absolutely thrilled to welcome you to my team!
This October promotion won’t last forever, so if you’ve been considering making the leap into the world of demonstrating, now is the perfect time. Whether you’re looking to enhance your crafting journey, build new friendships, or explore a flexible business opportunity, we’re here to support you every step of the way.
Ready to get started? Visit https://www.smithscraftycreations.stampinup.net/join_now/ and let’s begin this amazing crafting adventure together!
Have questions about becoming a demonstrator? I’d love to chat with you about this exciting opportunity. I can also help you decide which starter kit option would be perfect for your crafting goals. Don’t hesitate to reach out – I’m here to help!
❓ Got questions? Click “Join My Team” in the menu above for all the answers! 📋
Your crafting adventure awaits! 🌟🎉

Need a catalogue?
Email me at smithscraftycreations@gmail.com, connect on social media, or click any of the images below to view digital catalogues online. Remember to have a notebook and pen nearby to note down all those items you wish to order / add to your wish list.