Hello my lovlies,
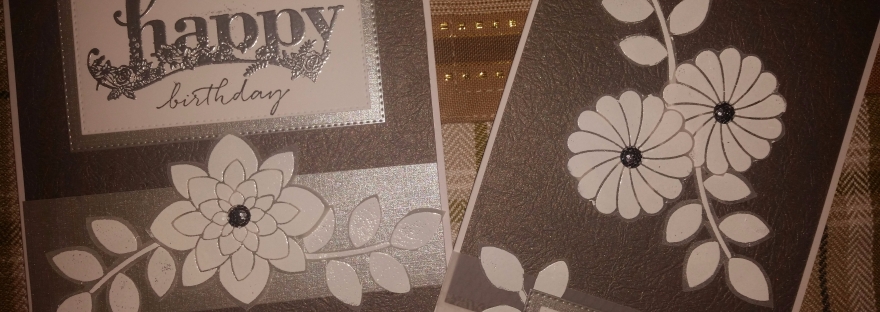
Well, I really love my latest Project Makes which are a birthday card and a friendship card using heat embossing on velum. This was my first attempt following a lovely youtube video from Natasha Foote of New Zealand and I have included the link to her video at the end of this blog.
And here are the cards:

Materials Required:
- Blank Card – I used a 5 x 7″ plain white card
- Slate Grey cardstock for bottom layer
- White cards stock
- Grey cardstock strip for top layer
- Velum
- Floral Stamps – I used both the Stampin’ Up! “Crazy About You” and “Happy Wishes” Sets
- Embossing Clear Stamp Pad
- Bright / Ultra White Wow Embossing Powder for die cuts
- Silver Wow Embossing Powder for Sentiment Stamped Images
- Double sided sticky pads
- Glue
- Co-ordinating silver gems / embellesments
Equipment Required:
- Die Cutting Machine – I used my new Gemini Electronic Die Cutter
- Heat Gun
- Paper Trimmer
- Stamping Platform or Stamping Block
- Scissors
- Anti-static pouch / bag
Step 1: Mat and Layer your card with the Slate Grey Cardstock / Grey strip ensuring you leave about 1/4″ border so that the white card stands out as another dimension to your card. (Sorry I forgot to take a photograph of the plain layered card!).

Step 2:
a) Apply your anti-static powder to both the velum and the white card stock that you will be stamping on.
b) In stages, apply your embossing ink to 1) your sentiments and 2) your floral stamps.
c) Apply relevant colour of embossing powder and tap to release any excess (scoop up the powder that is left and put back into your embossing tub before you spill it!).
d) Ensure your heat gun is nice and hot (I give mine about 30 seconds) before you heat emboss the powder to a marvellous finish.

Step 3:
Adhere and layer your stamped sentiments to the grey cardstock.
Step 4:
Fussy cut your floral embossed images.

Step 5:
a) Position and adhere your layered sentiment(s).
b) Position and adhere some of your images to your card (flush) and leave one or two to be adhered with your dimentional foam pads.
(HINT: Have a play around with the positioning of your embelleshments first till you are happy with the layout.)
Step 6:
Take a photograph of your gorgeous finished card – ain’t it lovely 🙂

Do you still have lots of fussy cut die pieces?
You can opt to make a second card using an alternative sentiment and left over die cuts like I have here.

You can see in the photo above/below I played around a little with positioning.

I finally opted for this design which I love!

And here are both finished projects.


Thank you for reading and I hope I have inspired you to make a similar card 🙂
Love Tx
Credit and Thank you Natasha Foote for the inspiration 🙂 You can view Natasha’s technique in the video below.

