

Good evening, it’s a late blog this evening as I haven’t had the time nor the motivation to craft these last few days, however, I am pleased to share with you this lovely Foliage Frame Framelit Die Calendar.
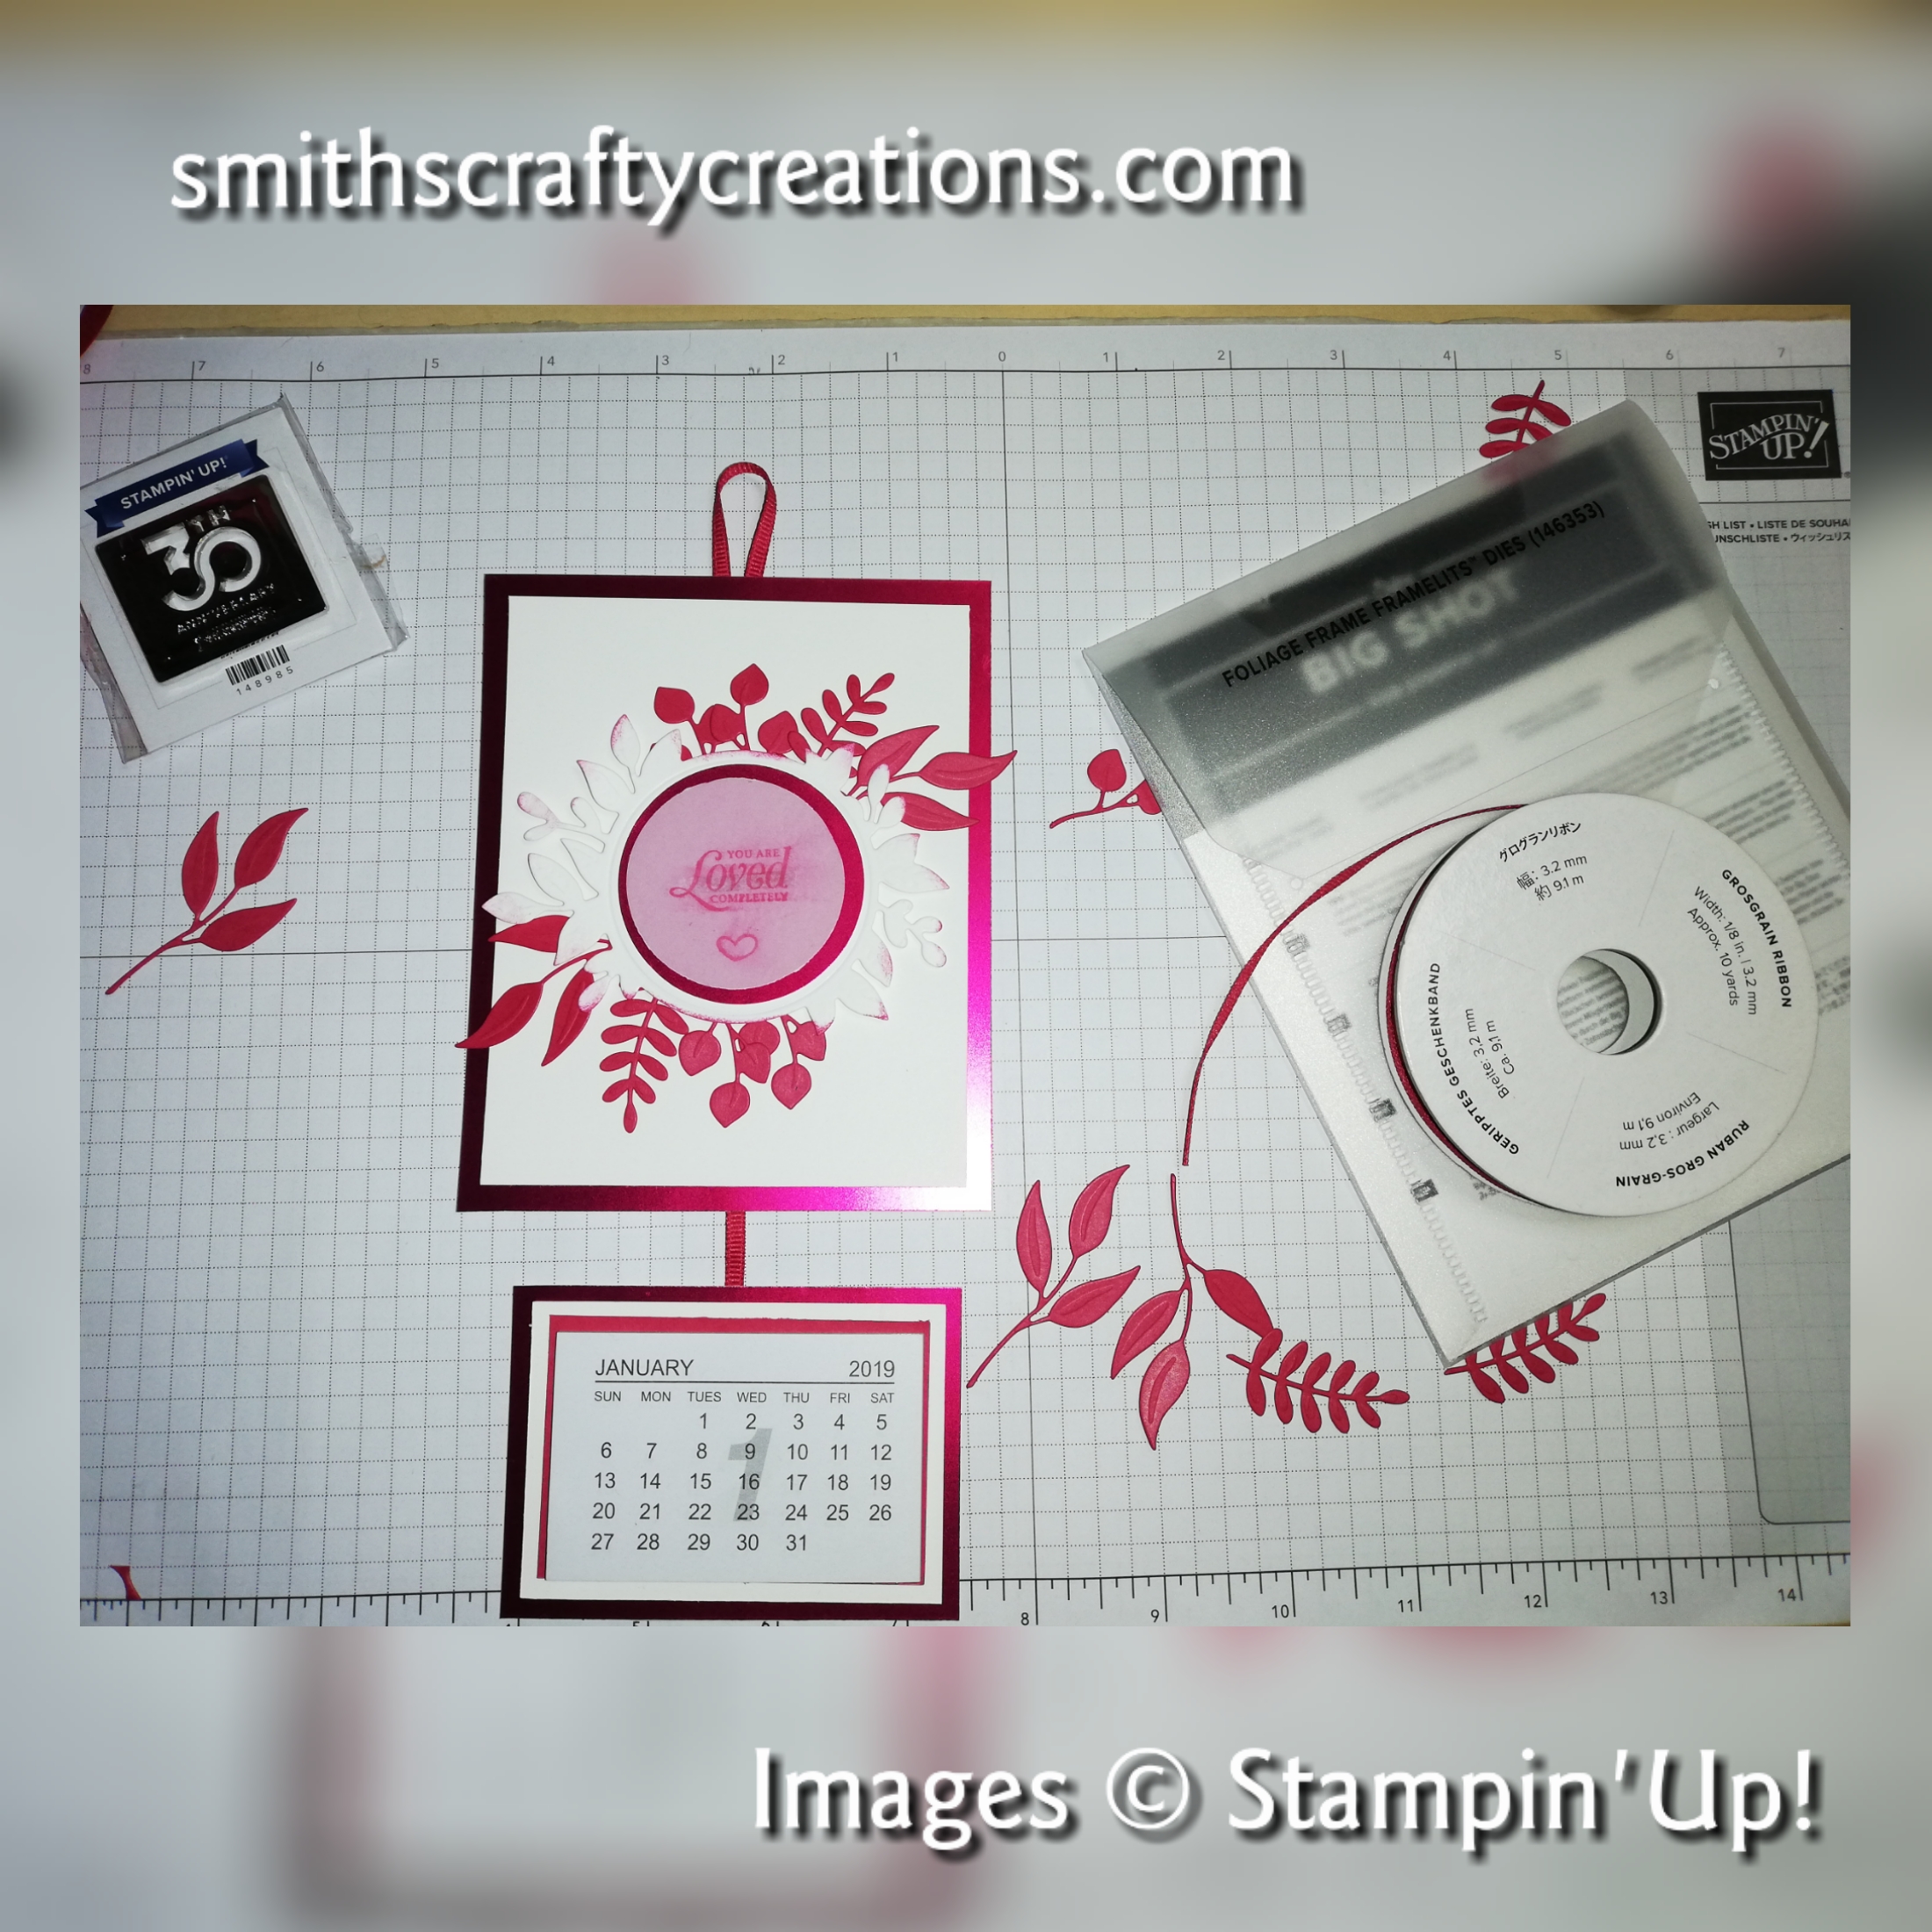
I have used the fabulous lovely lipstick stampin ink and co-ordinating cardstock and crossgrain ribbon with some whisper white and the fabulous FREE Sale-a-bration item I received with a recent £45 purchase – the fabulous grapefruit grove/lovely lipstick foil DSP sheets. I have linked these items below should you wish to get your crafty hands on them 🙂 The links will take you straight to my Stampin’ Up! Shop Page 🙂 Please remember that you will qualify for FREE products for each £45 spent on goods 🙂 Sale-a-bration only runs till the end of March and supplies are flying off the shelves.
Instructions (Calendar Part)
- Cut lovely lipstick special foil card down 2 1/2 x 3 1/2″
- Cut your next layer using whisper white down to 2 2/8 x 3 2/8″
- Cut your top layer using lovely lipstick cardstock down to 2 x 3″
- Adhere together using wet glue / double sided tape where prompted on tutorial
Instructions (Top Part)
- Cut lovely lipstick special foil card down to 4 2/8 x 5 2/8″
- Cut a piece of whisper white down to 3 7/8″ x 3 7/8″
- Adhere to first layer with double sided tape
- Die cut, using whisper white, the largest floral circle die from your framelit set
- Gently colour the edges with lovely lipstick ink and make up sponge
- Using the 2″ circle punch, punch a piece of the foil card and adhere
- Using the 1 3/4″ circle punch, punch a piece of velum paper and stamp sentiment/ image onto it using lovely lipstick- adhere with double sided tape (please let the ink dry fully – I forgot and smudged it ooops!)
- Using wet glue, adhere some die cut leaves to the back of your large die cut area – play around till your happy with their placement.
- Adhere to whisper white layer using dimentionals to give it some 3 D effect.
- Apply some embellishments (I forgot this part!)
- Finally, make a hanger loop and an adjoining section to finish off your project
Product List

|

|
|

|

|
|

|

|

|

|

|
|

|


 Grosgrain Ribbon")
Thank you so much for visiting my blog today I really do appreciate each and every one of you for supporting me 🙂 I’d love for you to come shopping via my online shop 🙂
If you have time, why not have a look at our current Stampin’ Up! promotions taking place at present, simply click on relevant images below.
Happy Crafting!
Love T x


Fancy becoming a business demonstrator or even a hobby demonstrator and receive great discounts on our products? Then why not join my team? We have a great joining offer on at present – sign up today for £99 and receive £71 of free product! Plus… not P&P costs. Simply click on the link below to find out how.. Send me an email via my contact page if you would like an informal chat.
