

Learn how to make this adorable fancy folding spinner card
Thank you for joining me today for another fun and cheerful Christmas Card, this is number #29 in my series, and Christmas is fast approaching us now! I am so excited that I managed my first Fancy Fold Handmade Spinner Card.
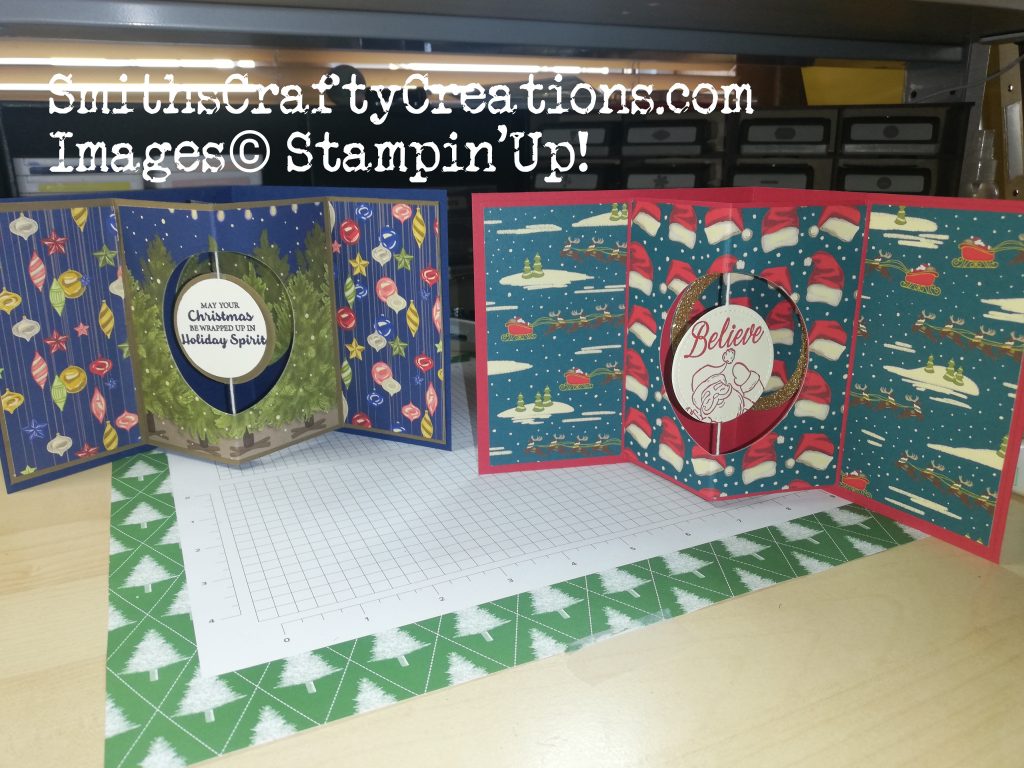
Okay so this handmade card is a fancy fold card that also incorporates a spinner section. I had one try at this earlier in the week and hope that by tweaking my practice card, I am able to show you how to recreate it easily.
Now the tutorial is 30 minutes long as there are a few parts to this card.
Now because I designed the card for being more ornamental than postable – the circle spinner does stick out slightly when you close the card – you can stop this by using a smaller circle or a die cut tree for instance.
All products used are listed below for your perusal.

Measurements:
Card Base Cut an A4 piece of cardstock down to 10 x 5 inches and with the longest side at the top, score at 5″ (or fold in half)
Card Construction layer Cut a piece of the same coloured cardstock down to 9 3/4 inches by 4 3/4″ – with the longest side at the top score at 2 5/8″ and 4 7/8″ then flip and score at 2 5/8″ on the opposite side.
Card Front Layers
Cut a piece of cardstock down to 4 7/8 squared for your matt later.
For your DSP layer cut a piece of DSP down to 4 3/4″ squared.
Inside layers I decided only to layer the inside with DSP rather than Matting and DSP layering – saves on the bulk of the card and makes for easier construction of the folding sections.
Inside DSP Layers You will need x2 pieces that measure 2 4/8″ x 4 5/8″ for each end of the card. For the inside part you will need x1 piece measuring 4 5/8″ squared.
Instructions
Place your inner DSP center layer on top of your card and run through your die cutting machine to cut out your desired circle shape. Lay this DSP and the die cut negatives to one side for now.
Adhere the construction of the card to the card base.
Adhere the layers to both the front and the two small inner panels.
Press your card open and adhere the negative die cut piece of DSP inside the circle so that it is now on the inside of the card ie on the card base. Wait till glue drys and then fold and burnish to shape of card.
Adhere your other circle border layer if you decide to use one although it isn’t mandatory for this project.
Die cut your circle piece for the spinner card, you will need x2 of these,
Stamp image and / or sentiment of choice on both circles before attaching a piece of twine or ribbon centrally. Adhere both together well and make sure the twine isn’t able to move.
Attach your spinner section to front of the card (where you die cut out the circle) using tear and tape or red tape or sellotape.
Adhere your final piece of DSP over this area too making sure you add lots of glue so that it sticks nice and solid – less chance of your spinner twine coming undone.
Decorate further to your own style front and inside if you wish.
I used a memories and more card to decorate the front and finished it off with a little sticker.
Products Used:
Product List Designer Series Paper")


You Tube Tutorial – Fancy Fold Handmade Spinner Card
Thank you so much for visiting me today. I hope that you enjoyed this project and can take something away from today to try at home.
Don’t forget to check out my Shop Now page, Customer Reward Page, Monthly Creative Crafting Kit Page and my Special Offers pages.
Don’t forget to subscribe to my YouTube Channel too www.youtube.com/smithscraftycreations