

Welcome to today’s blog featuring a mother’s day card using dressed to impress
Hi and welcome to another Make it Monday episode, we are on number 47 of this series today. I decided to make another Mother’s Day Card today. You can join me and other fans at 4pm today during the live premiere of this project over on YouTube. Link is below, further down this page.

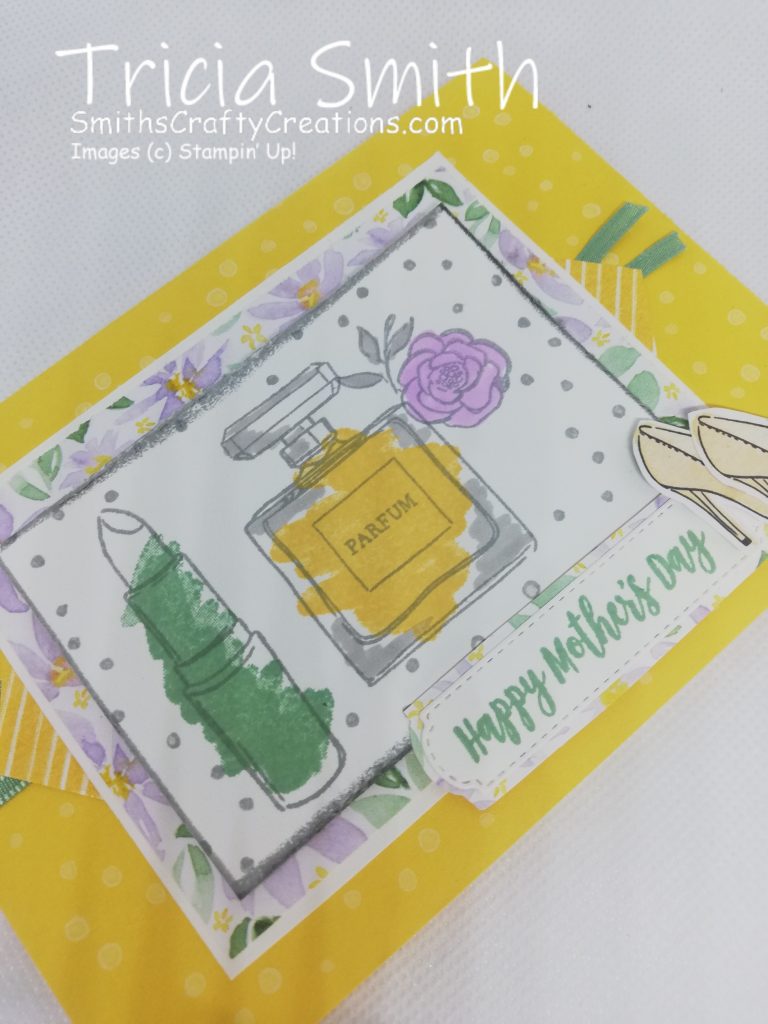
Today’s project is using the Dressed to Impress stamp set and co-ordinating Designer Series Paper: Best Dressed which both feature in our Mini Catalogue for January to June 2020. When shopping with me, you can obtain a FREE product by spending £45 +
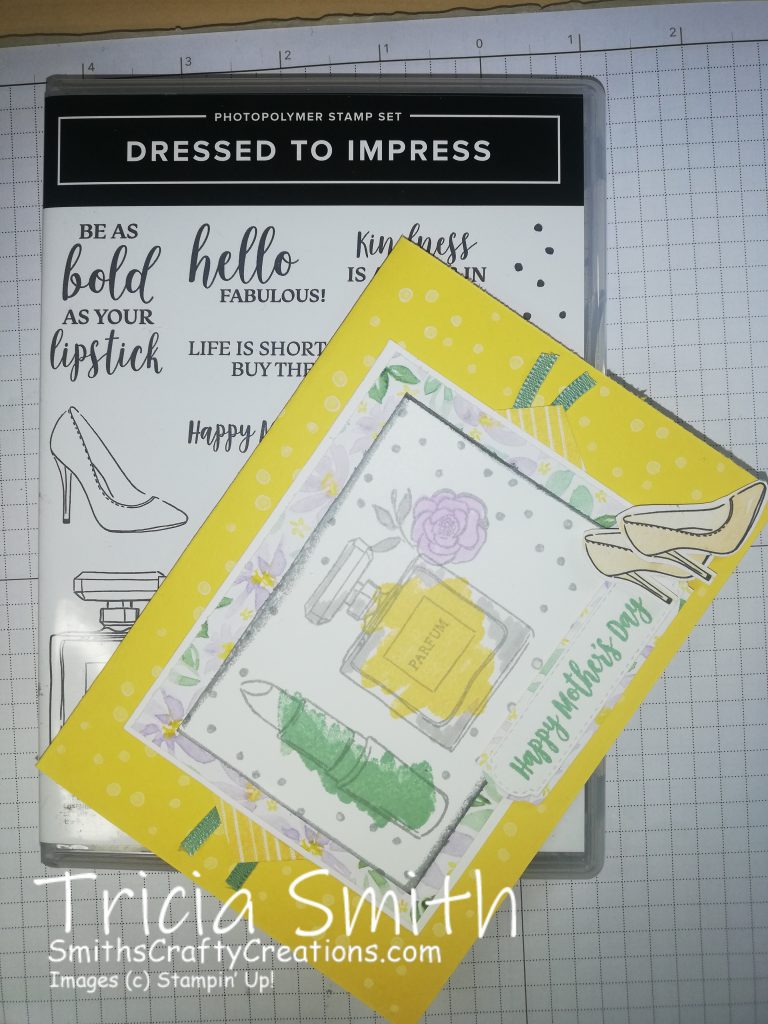
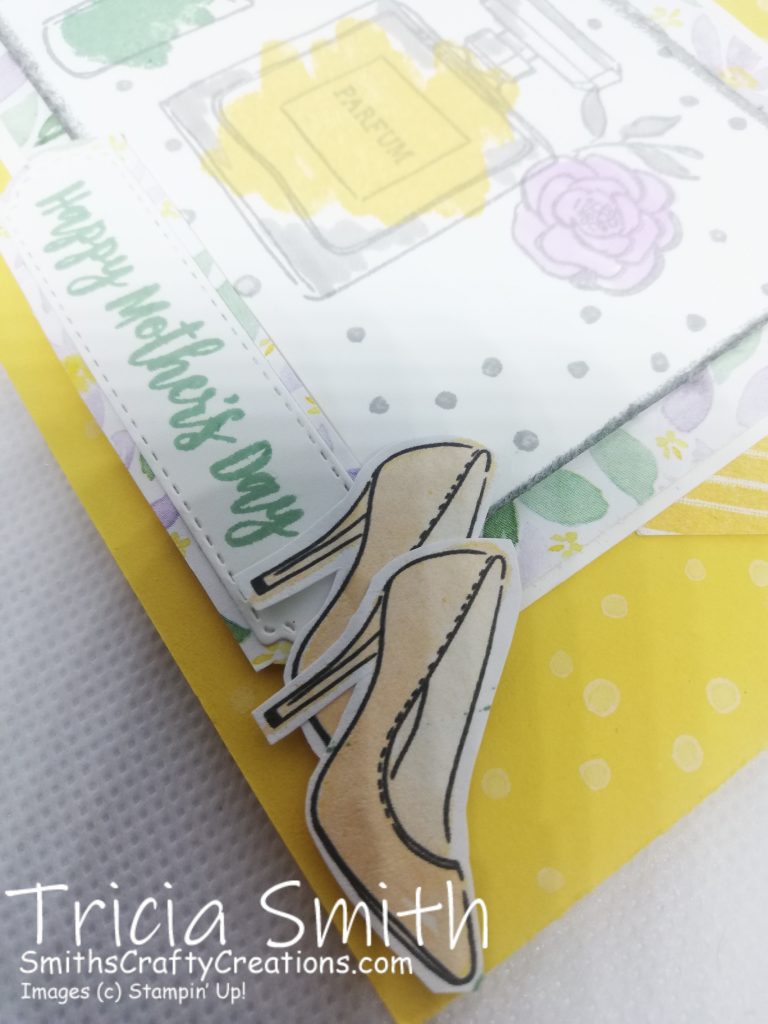
This project is just fabulous! I especially love the fussy cut images I took directly from the DSP 🙂
I decided to use Daffodil Delight for my card base and Pool Party, So Saffron, Gray Granite and Purple Posy for my stamping colours.

Isn’t this suite just beautiful – I’m having so much fun playing with these new products.
My Youtube channel is via the link below – I’d love for you to pop over to subscribe and watch this premiere with us. Link is further down the page.

I hope you like today’s project.
Looking for a hard copy of our new Mini Catalogue – why not Contact me for a free copy.
Instructions and Measurements:
My card base is Daffodil Delight and measures 4 1/8″ x 5 7/8″
Matt Layer (Centre) is whisper white measuring 4 2/8″ x 3 2/8″
DSP Layer (Centre) is a piece of DSP measuring 4 1/8″ x 3 1/8″
Stamping Layer (Centre) is whisper white measuring 2 1/2 x 3 1/2 inches
My sentiment label is from the co-ordinating All Dressed Up Dies from this suite.
Step One – Hand stamp your card base to give it some more character.
Step Two – Adhere Matt Layer and DSP Layer together. Attach two little banner sections and some co-ordinating ribbon on the underneath before adhering to card base.
Step Three – Stamp your desired images onto top stamping layer and colour as you wish – adhere to card.
Step Four – Stamp and layer up your sentiment area.
Step Five – Attach accents (die cut shapes / images) to edge of sentiment area.
Step Six – Adhere card insert inside and stamp as you wish.
Thank you so much for taking the time to visit my blog today.
Products Used:
Thank you so much for visiting me today. I hope that you enjoyed this project and can take something away from today to try at home.
I used little supplies today, all of which you can find online in my online shop here:
www.smithscraftycreations.stampinup.net
")


YouTube Tutorial – Make it Monday 47 – Mother’s Day Card
Don’t forget to check out my Shop Now page, Customer Reward Page, Monthly Creative Crafting Kit Page and my Special Offers pages.
Don’t forget to subscribe to my YouTube Channel too www.youtube.com/smithscraftycreations