

Welcome to today’s Simple Stamping #49 Learning how to make handmade invitations
Hello and thank you so much for joining me for yet another Simple Stamping Project Blog – #49. Today’s Project is learning how to make handmade invitations. Whether this be for your kid’s party, wedding invitations, the limits are endless with these stamp sets.

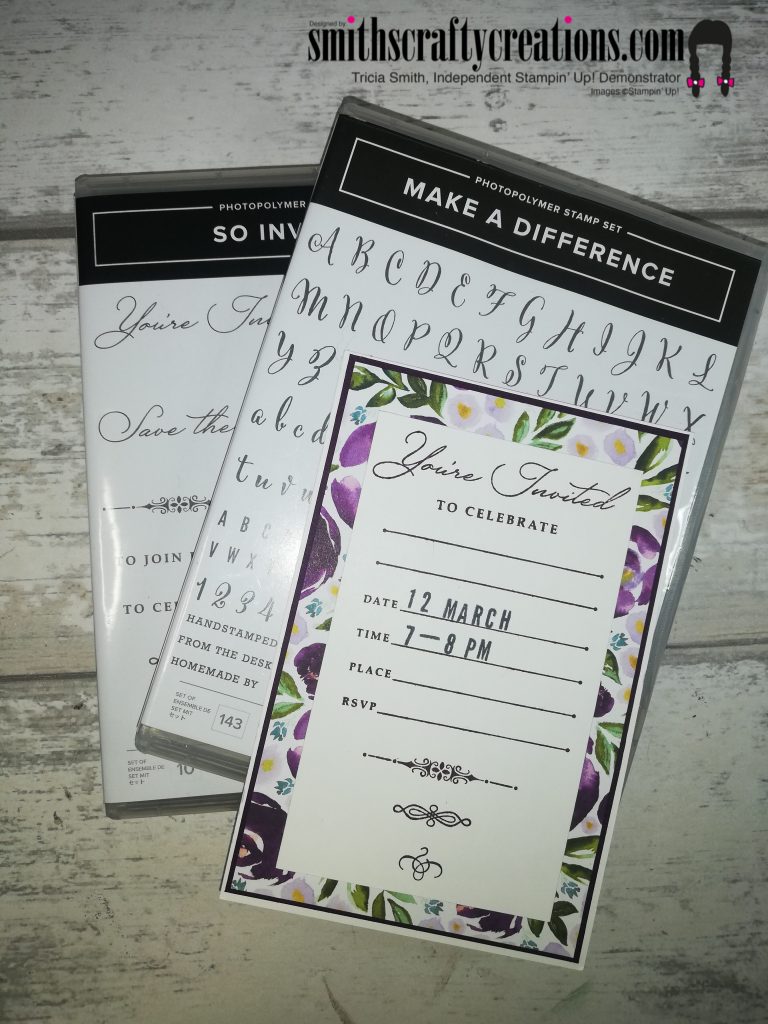
The stamp sets I’m using today are So Inviting and Make a Difference. Both these sets are suitable and would make a great tool for crafters. Suitable for wedding planners, journal addicts, artisan creators and the list goes on.


The So inviting set has a total of ten stamps and the Make a Difference has 148 stamps. There is a choice of two fonts for both the alphabet and numeric stamps. There is also a whole array of stamp sentiments suitable for making and complimenting any handmade products.

These fonts are just stunning. The capitalised alphabet fonts remind me of when the librarian at school or the library used to stamp the inside of the book. Both sets are photopolymer so you can see easily, for precision stamping.


The colour and DSP chosen today are Whisper White for the invitation, layered with Blackberry Bliss and a piece of DSP from Best Dressed Suite. Of course I topped it with more Whisper White. I used co-ordinating ink in Blackberry Bliss also.
Instructions and Measurements:
For the size of the invitation today today I chose 4″ x 6″ whisper white base layered with Blackberry Bliss card stock 5 7/8 x 3 7/8″. My DSP layer measures 5 3/4 x 3 3/4 inches. My whisper white stamping layer measures 3 x 5 inches. A slightly bigger increment in order for us to really see that beautiful DSP underneath.
Using my Stamparatus (R) I stamped my layer in Blackberry Bliss before adding a date using my Stampin’ Up! Stampin’ Blocks.
My favourite stamp in this set is the larger of the two bee stamps. The first stamping was to stamp the largest bee in the centre of the rectangle stamping section. I then added a sentiment around the top of the bee.
You could take your invitation that extra mile by adding some co-ordinating ribbon and embellishments. I wanted to keep it nice and simple for you today.
TOP TIP: Number 6 in both font designs double up as Number 9 – so please don’t panic when you can’t find number 9 on your stamp set. 🙂
My Youtube channel is via the link below – I’d love for you to pop over to subscribe and watch this premiere with us.

Looking for a hard copy of our new Mini Catalogue – why not Contact me for a free copy.
Heartfelt thanks for taking the time to visit my blog today I hope that you have time to view the YouTube video below also.
Products Used:
I hope that you enjoyed this project and can take something away from today to try at home.
Product List
")


 Designer Series Paper")


You can find all products in my online shop here:
www.smithscraftycreations.stampinup.net
YouTube Tutorial – Simple Stamping #49 – How to make Handmade Invitations
You can join me at 8 am UK time for crafty chat via my youtube tutorial (link below) premiere. Simply click on the link and set yourself a reminder 🙂
Don’t forget to check out my Shop Now page, Customer Reward Page, Monthly Creative Crafting Kit Page and my Special Offers pages.
Don’t forget to subscribe to my YouTube Channel too www.youtube.com/smithscraftycreations