How to Make Your First Handmade Card – Step by Step ✂️💕
Have you ever looked at a handmade card and thought, “I’d love to try that, but I wouldn’t know where to start?”
Then this tutorial is for you.
Today we’re going right back to the basic basics and making your very first handmade card together. You don’t need a craft room full of supplies, you don’t need lots of expensive equipment, and you definitely don’t need to understand all the crafty terminology!
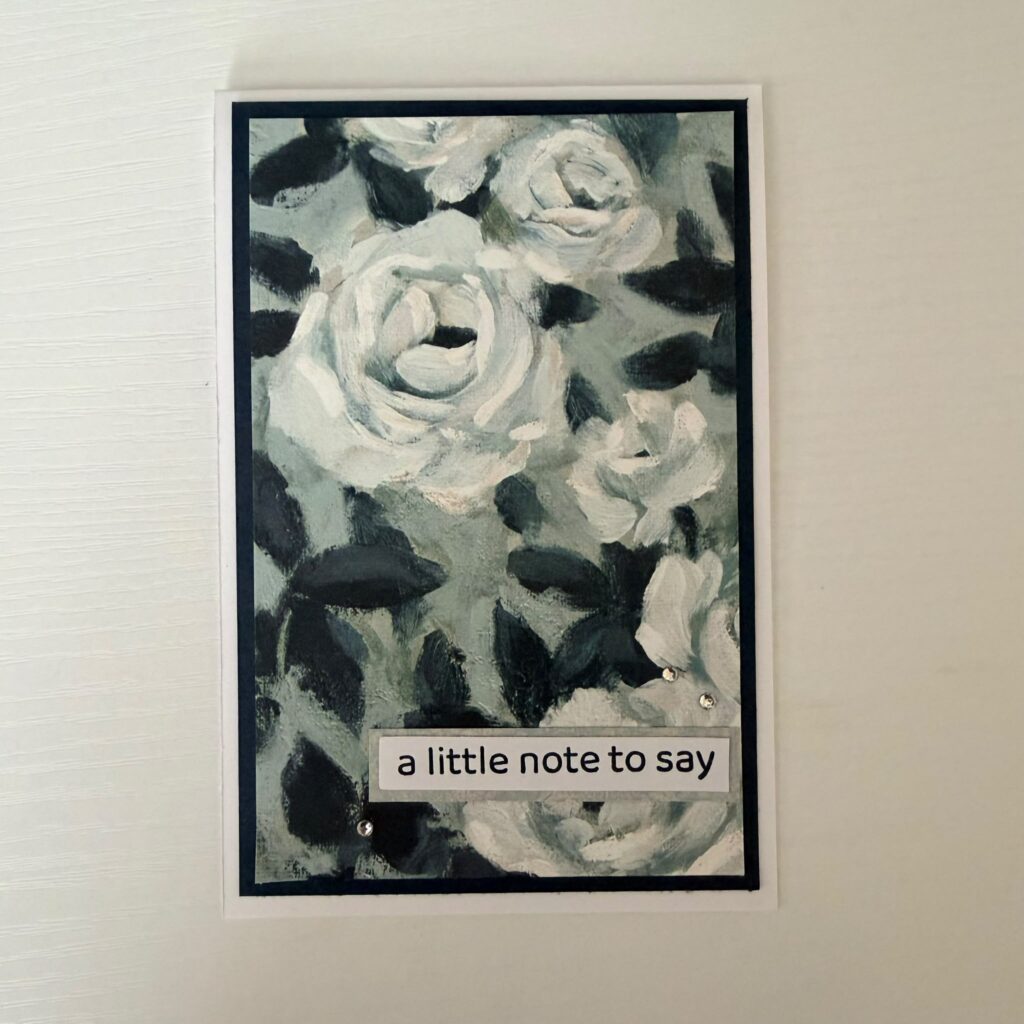
We’re making a simple 6″ × 4″ handmade card using cardstock, patterned paper and a sentiment.
I’ll also explain some of the card-making words you might hear along the way.
So, grab your supplies and let’s get started! 🌸
What Do I Need to Make My First Handmade Card?
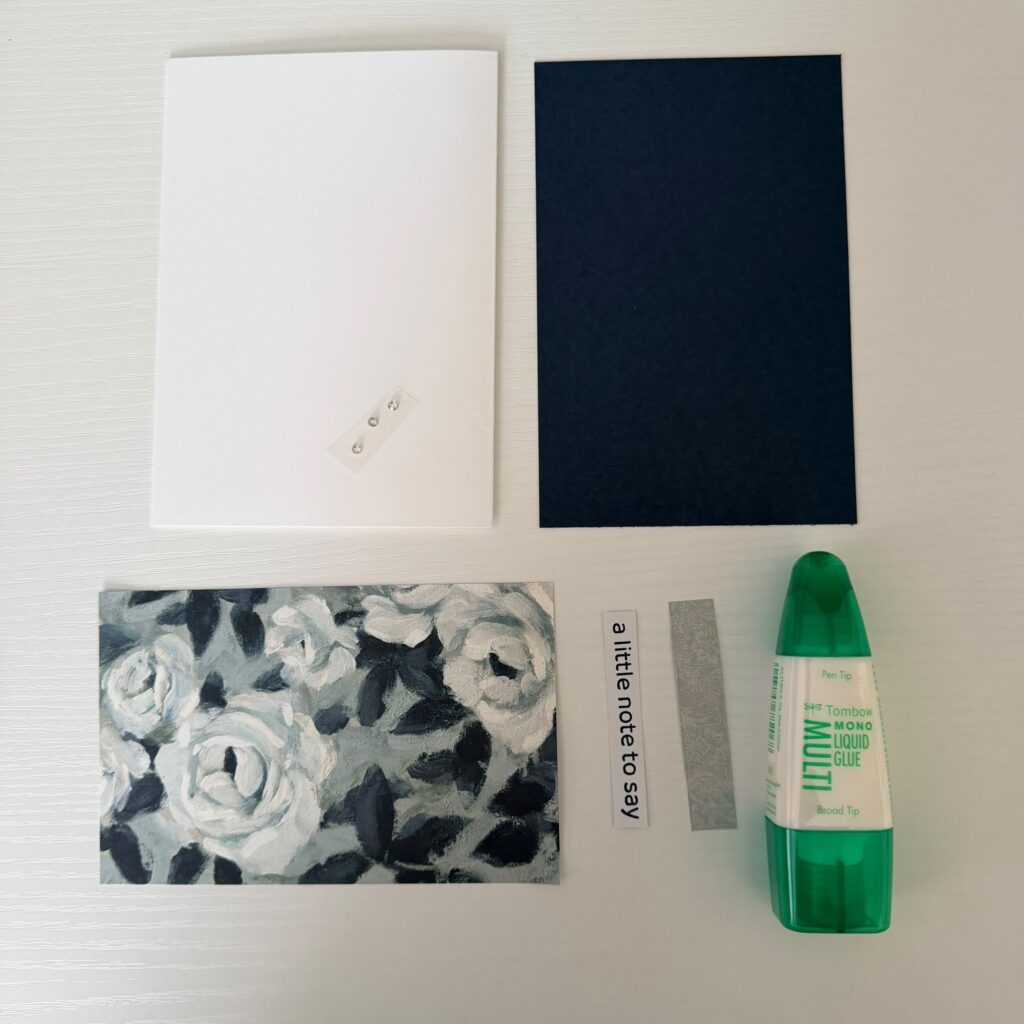
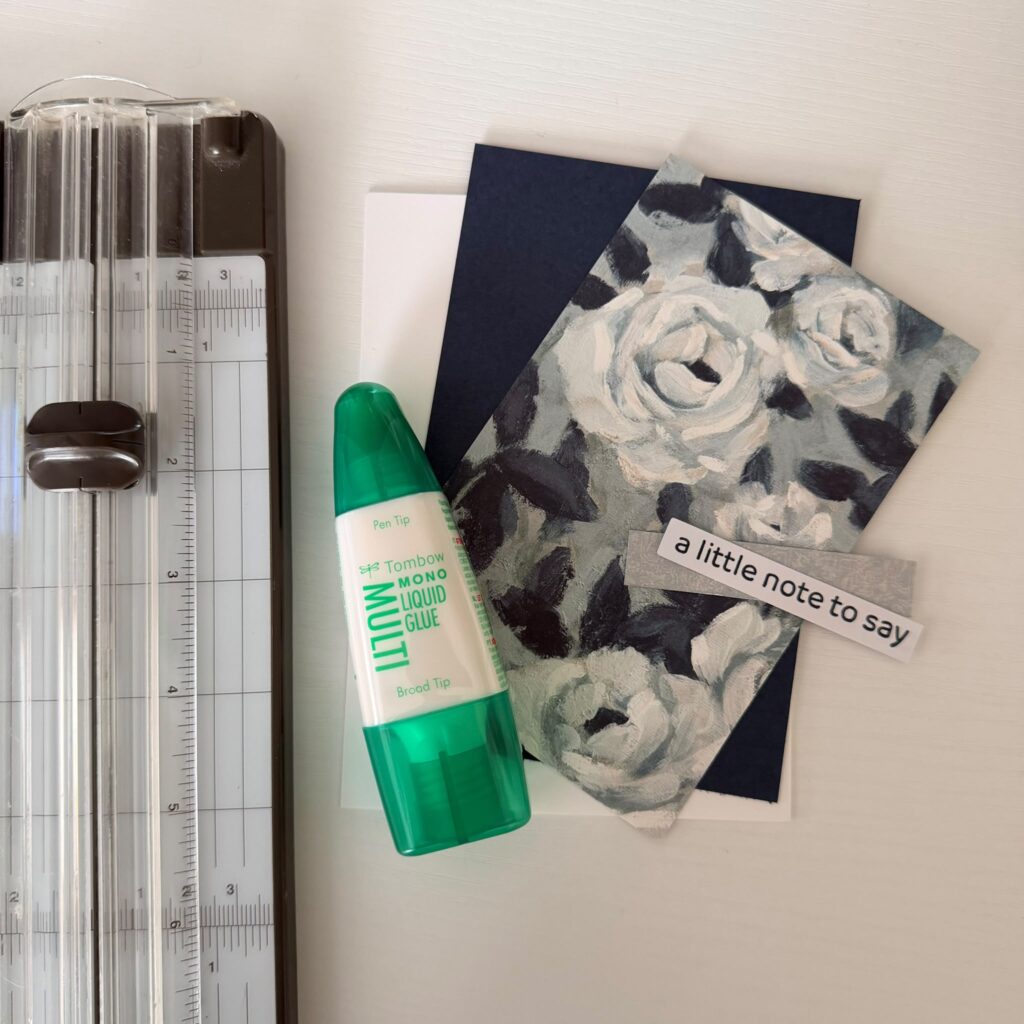
You only need a few basic supplies for this project:
- Cardstock measuring 12″ × 6″ for your card base
- Coloured cardstock measuring 3¾” × 5¾”
- Patterned paper measuring 3½” × 5½”
- A sentiment such as Happy Birthday, Thank You or Thinking of You
- Glue or another suitable paper adhesive
- Scissors or a paper trimmer
- Optional sticky gems, pearls or other little embellishments
🌸 Beginner Tip
When choosing your coloured cardstock, have a look at your patterned paper first.
Pick out one of the colours you can see in the pattern and choose cardstock in a similar colour. This is one of the easiest ways to make your handmade card look coordinated.
Don’t overthink it, though. This is your first card – we’re here to have fun!
Step 1 – Make Your 6″ × 4″ Card Base
Let’s start with the most important part – the card itself.
Take your piece of cardstock measuring:
12″ × 6″
Fold it in half.
Your folded card will now measure approximately:
6″ × 4″
Give the fold a good press with your fingers so that it sits nice and flat.
And there you have it – you’ve made your first card base! 🎉
What Is a Card Base?
You’ll hear me use the words card base quite a lot.
It simply means the folded piece of cardstock that everything else is going to be added to.
Nothing complicated at all!
Step 2 – Add Your Coloured Mat Layer
Now we’re going to start making your card look a little more interesting.
Take your coloured piece of cardstock measuring:
3¾” × 5¾”
Add glue to the back and position it in the centre of the front of your card.
Try to leave a reasonably even border around all four sides.
What Is a Mat Layer?
In card making, we call this coloured piece a mat layer.
A mat is simply a piece of cardstock placed underneath another layer. It creates a lovely border and helps the next layer stand out.
And please don’t worry if your borders aren’t completely even!
You’re making something by hand. It doesn’t need to look like it has come out of a factory. 💕
Step 3 – Add Your Patterned Paper
Next comes the pretty bit! 🌸
Take your patterned paper measuring:
3½” × 5½”
Add some glue to the back and position it in the centre of your coloured mat layer.
Because your patterned paper is slightly smaller than the cardstock underneath, you should be able to see a lovely coloured border all the way around it.
Already, your card should be starting to come together!
What Does DSP Mean?
Here’s another little bit of crafty terminology for you.
You might sometimes hear me talking about DSP.
DSP stands for Designer Series Paper, which is what Stampin’ Up! calls its patterned paper.
So, if you’re following one of my tutorials and I suddenly tell you to grab your DSP, don’t panic! 😂
I just mean your pretty patterned paper.
Step 4 – Choose a Sentiment for Your Card
Now we need to decide what your card is going to say.
In card making, the words or greeting on the front of the card are usually called a sentiment.
For example, you might choose:
- Happy Birthday
- Thank You
- Thinking of You
- Best Wishes
- Congratulations
- Just for You
And here’s something important for complete beginners:
You don’t need to own any stamps yet!
You could print a sentiment from your computer, use a sticker or use a ready-made greeting.
For an especially easy option, you could choose one from our GREETINGS FOR ALL Ephemera Pack.
Choose your sentiment and decide where you’d like it to sit on your card.
But don’t stick it down just yet!
We’ve got one more little trick to try first.
Step 5 – Add a Mat Behind Your Sentiment
Remember the coloured cardstock we used underneath your patterned paper?
Grab a little leftover piece of that same colour.
Glue your sentiment onto the coloured cardstock and carefully cut around it, leaving a small border.
You’ve now created another little mat layer!
Using the same cardstock colour again helps tie the whole card design together.
Once you’re happy with it, glue your sentiment onto the front of your card.
It could go in the centre, towards the bottom, off to one side – wherever you think it looks best.
There are no card-making police here! 😂✂️
Step 6 – Finish Your First Handmade Card With Some Gems ✨
Technically, your card is finished already.
However, if you happen to have some sticky gems, pearls or other small embellishments, this is a lovely time to add them.
Try adding 3 or 5 gems around the sentiment area.
Avoid sticking them directly onto the words. Instead, scatter them around the sentiment to draw attention towards it.
Why Use Three or Five Gems?
You’ll often see crafters decorating in odd numbers.
Groups of 3 or 5 tend to look balanced without looking too organised or symmetrical.
But this isn’t a rule you need to worry about.
If you like two gems – use two!
If you don’t want any gems – don’t add any!
It’s your card.
And That’s It – You’ve Made Your First Handmade Card! 🎉
Take a look at what you’ve just created.
You started with a plain piece of cardstock and turned it into a handmade card that you can give to someone.
Even better, you’ve already learned some basic card-making terminology:
Card base – the folded cardstock that forms your card.
Mat layer – a coloured cardstock layer used underneath another piece.
DSP / Designer Series Paper – the pretty patterned paper.
Sentiment – the greeting or words on your card.
Embellishments – decorative extras such as gems, pearls or sequins.
That’s quite a lot for your very first card!
Your First Card Doesn’t Have to Be Perfect 💕
If you’re looking at your finished card and noticing a wonky border or a gem that’s slightly out of place, please don’t let that put you off.
Nobody starts a new hobby already knowing how to do everything.
Experienced card makers have had practice. They’ve learned little tricks along the way, experimented with colours and layouts, and probably made hundreds – if not thousands – of cards.
You are allowed to be a beginner.
The important thing is that you’ve tried something new and made something with your own hands.
And who knows?
This first little card might just be the beginning of a brand-new hobby. ✂️🌸
Are You Completely New to Card Making?
I’d especially love to hear from you if you’ve never made a handmade card before.
What part of card making are you unsure about?
Is it knowing what supplies to buy? Cutting cardstock? Choosing colours? Understanding all the strange crafty terminology?
Leave me a comment and tell me.
I’m creating more complete beginner card-making tutorials, so your questions could help me decide what we learn together next.
Got a question? Feel free to message or email me! 💕
There really is no such thing as a silly question, especially when you’re learning something completely new.
📩 Email me at Smithscraftycreations@gmail.com or send me a message through my social media pages.
I’m more than happy to help you get started, explain the basics or point you in the right direction.And your first handmade card could be the beginning of something rather lovely.
Happy crafting!
Tricia 💕
Smith’s Crafty Creations
Smith’s Crafty Creations
Creativity isn’t about perfection. It’s about relaxation, and making time for yourself.
#SmithsCraftyCreations #CouldCraftingBeYourNewThing #CardMakingForBeginners #PapercraftingForBeginners #NewHobby #CreativeHobbies #CardMakingUK #Papercrafting #TrySomethingNew #CreativeCommunity #StampinUp
🌸 Fancy Giving This Papercrafting a Try?
If you’re completely new to papercrafting, I’d love to help you get started. Follow my beginner series, join my crafty community, or get in touch and tell me “I’M NEW!”
💕 Follow the beginner series
👭 Join my crafty community
✂️ Find out about beginner classes
📧 Sign up to my newsletter
💕 Card Making for Beginners I need YOU
👭Card Making Basics
✂️How to Make Your First Handmade Card


