

Good evening everyone! Another late blog and this one has literally taken me a few days to do due to one thing or another – but I managed. I wasn’t 100% confident with the card although it did turn out okay in the end.
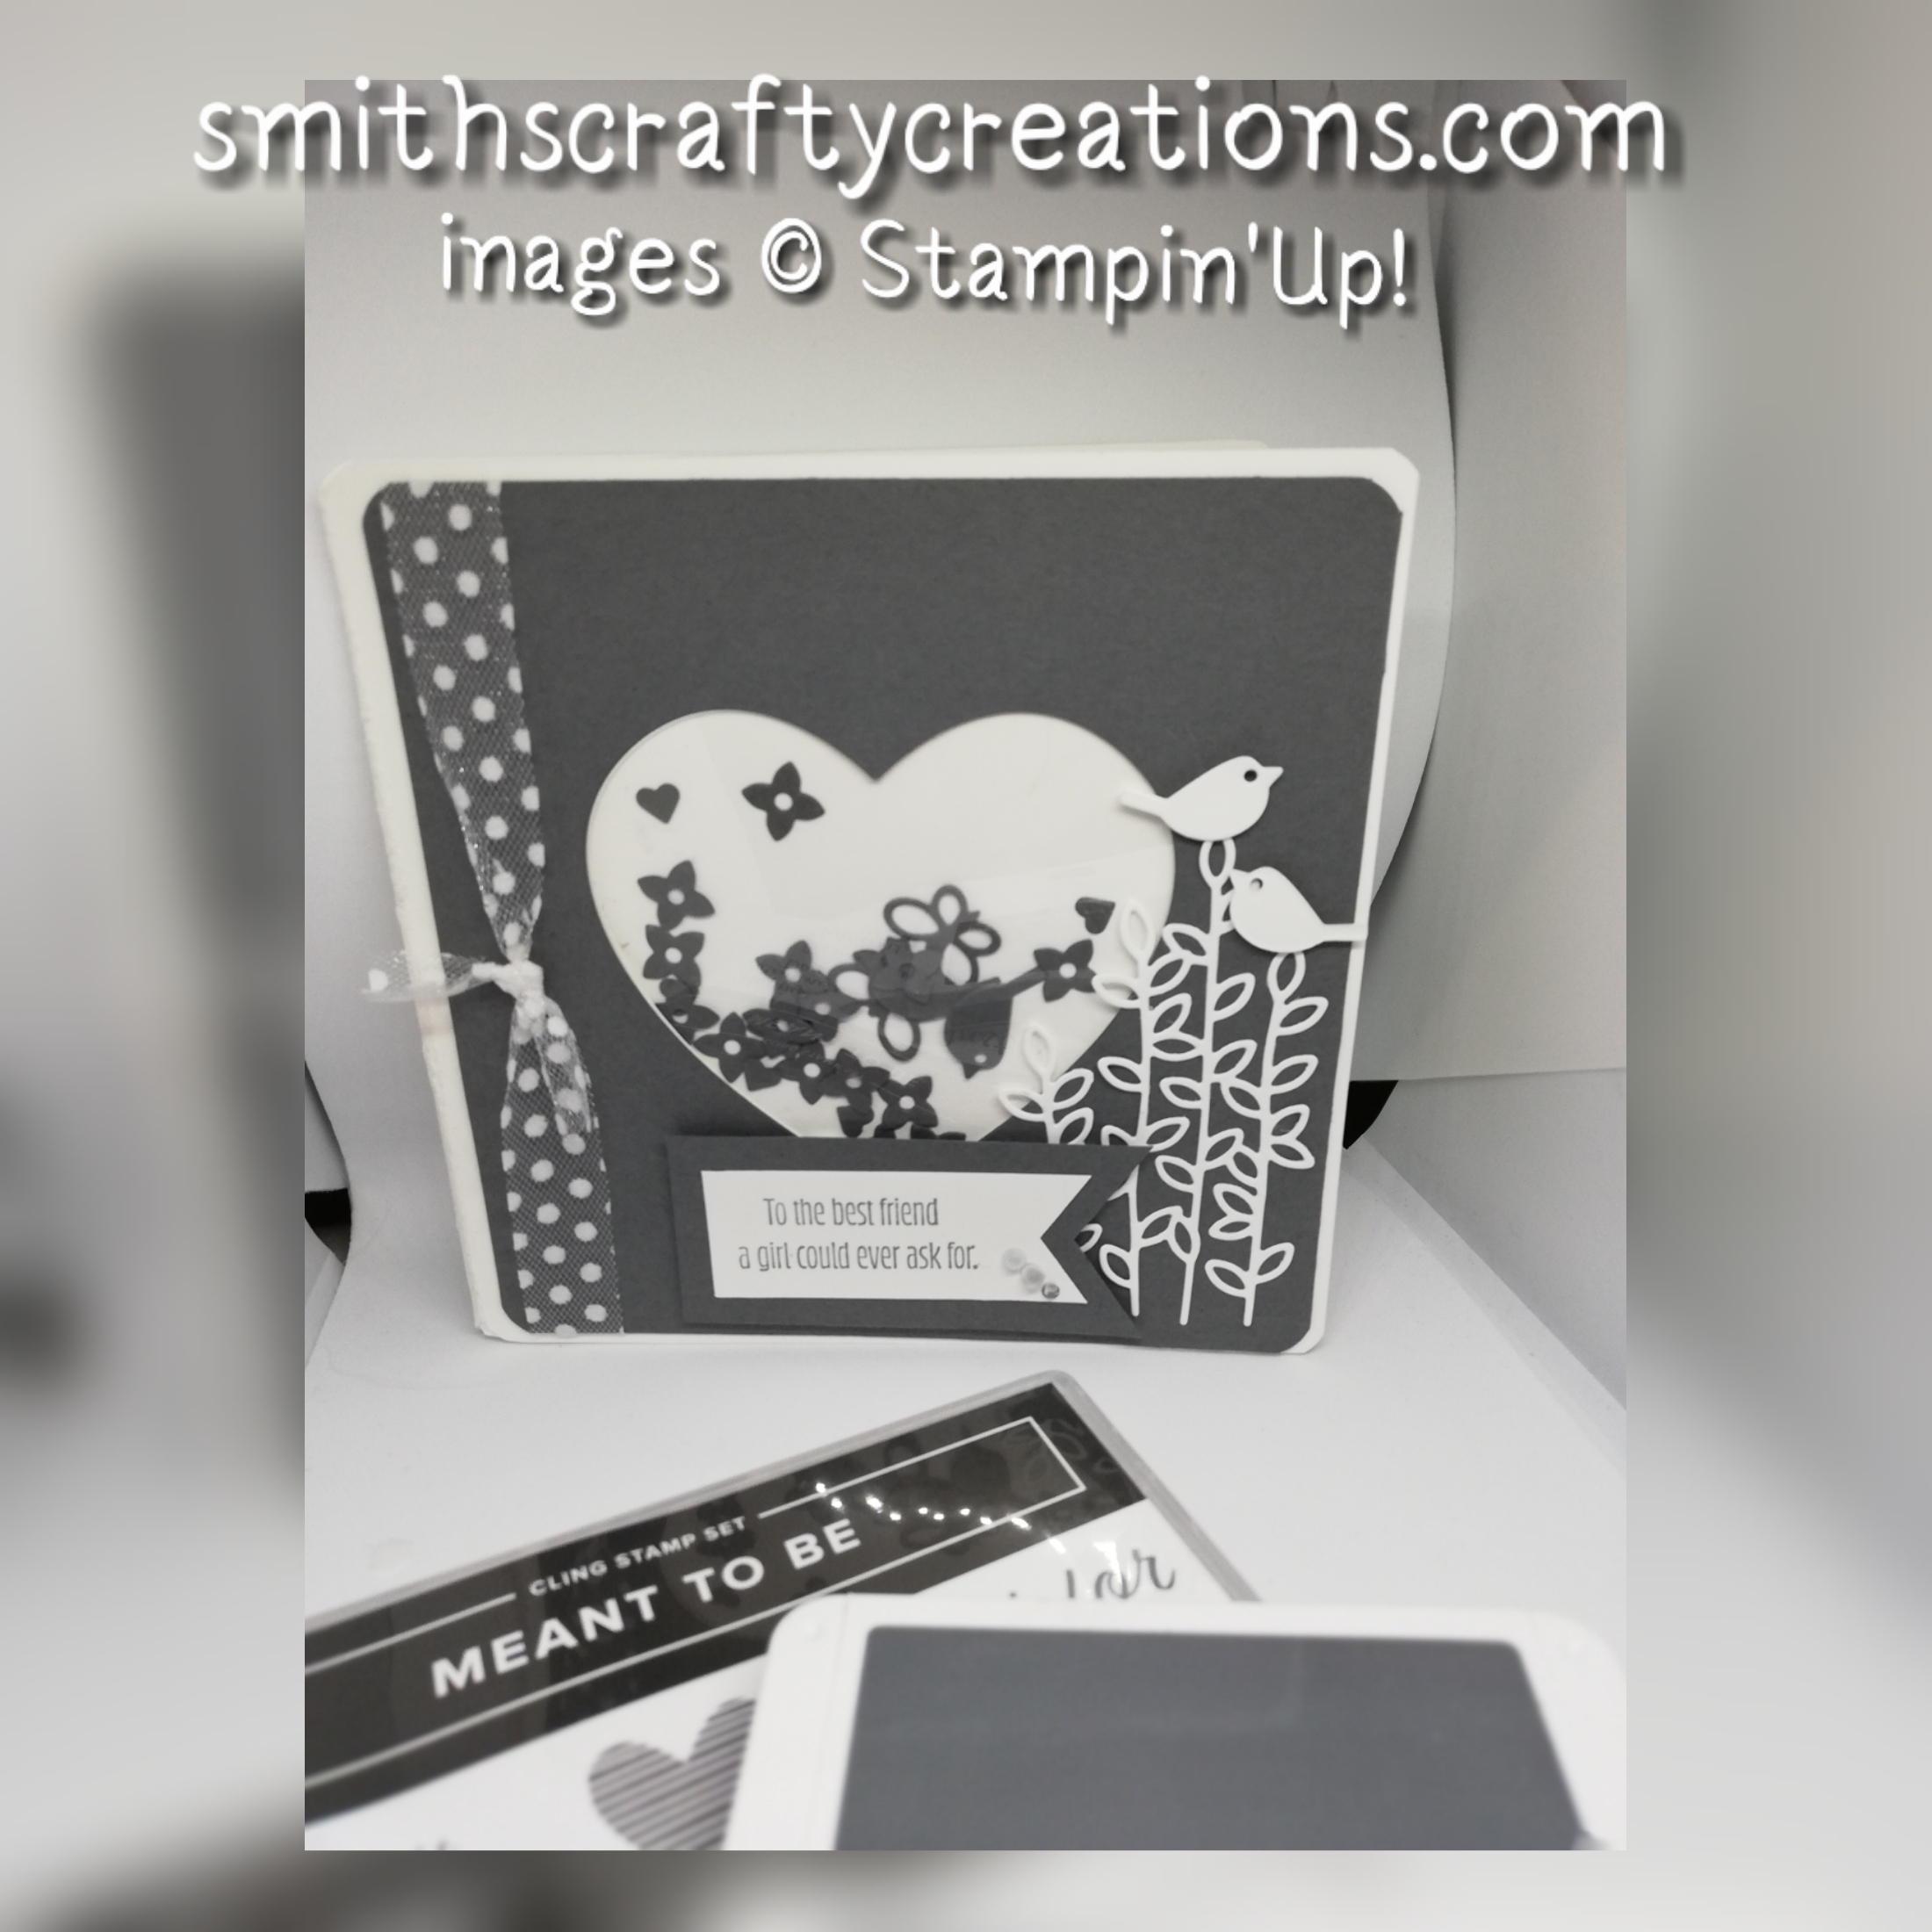
This tutorial uses the new Spring/Summer 2019 Catalogue Well Written Framelit Dies and Meant to Be Cling Stamp Set as well as Basic Gray Co-ordinating Cardstock and Stamp Pad. I have linked these items below should you wish to get your crafty hands on them 🙂 The links will take you straight to my Stampin’ Up! Shop Page 🙂 Please remember that you will qualify for FREE products for each £45 spent on goods 🙂
Instructions:
Card Base / insert
- Cut thick whisper white cardstock down to make a 5 7/8 x 5 7/8 square card and round corners using envelope punch board
- Cut a piece of grey cardstock down to 5 6/8 x 6 6/8″, again round corners.
- Die cut a love heart in centre of both the front of the card and the card layer ensuring they match up centrally.
- Using the next size up heart die, cut a piece of acetate and adhere to inside of card.
- Die cut your shaker pieces from a piece of gray cardstock.
- Place your die cut shaker pieces onto the middle of the acetate away from the edges.
- Apply double-sided tape (or glue) around the outside of the heart (on the inside of card)
- Cut a piece of normal whisper white cardstock big enough to “line” the inside of your card – add some wet glue to outer area of card inside and add this section making sure it is all even.
Card Front/Sentiment Layer
- Apply a piece of whisper white polka dot tulle ribbon to around the left side of grey card layer (see instructions above) before adhering to the card base.
- Die cut your foliage pieces and birdies/butterflies from whisper white basic cardstock and adhere to front of card
- Add a layered section for your sentiment using the triple banner punch (bottom layer 1.5″ wide, stamping layer 1″ wide)
- Stamp sentiment of choice onto white section and trim down so that the sentiment is central
- Adhere to gray layer, and again, trim down accordingly.
- Adhere to front of card using dimensionals.
Product List

|

|
|

|

|
|

|

|
|

|

|

|

|


 Polka Dot Tulle Ribbon")

Thank you so much for visiting my blog today I really do appreciate each and every one of you for supporting me 🙂
If you have time, why not have a look at our current Stampin’ Up! promotions taking place at present, simply click on relevant images below.
Happy Crafting!
Love T x


Fancy becoming a business demonstrator or even a hobby demonstrator and receive great discounts on our products? Then why not join my team? We have a great joining offer on at present – sign up today for £99 and receive £71 of free product! Plus… not P&P costs. Simply click on the link below to find out how.. Send me an email via my contact page if you would like an informal chat.
