

Welcome to today’s blog post on how to make a Buckle Front Fastening Travel Journal
Hi and welcome to my blog. Today’s project was thoroughly enjoyable to make. Let me show you how to make a Buckle Front Fastening Travel Journal from a basic notebook.
For today’s project I used a supermarket store bought pack of three small notebooks. They are only £1 per pack and measure 4-1/4″ x 5-5/8″ appx.
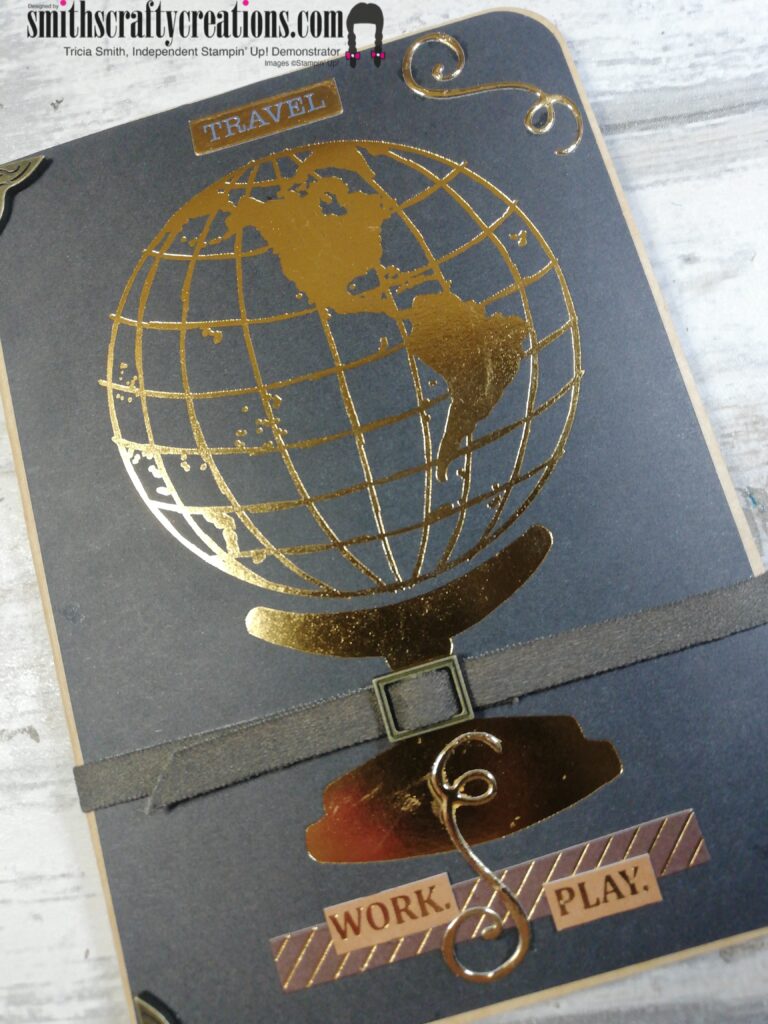
On both the front and rear of the book I used memories and more cards from the World of Good Suite.

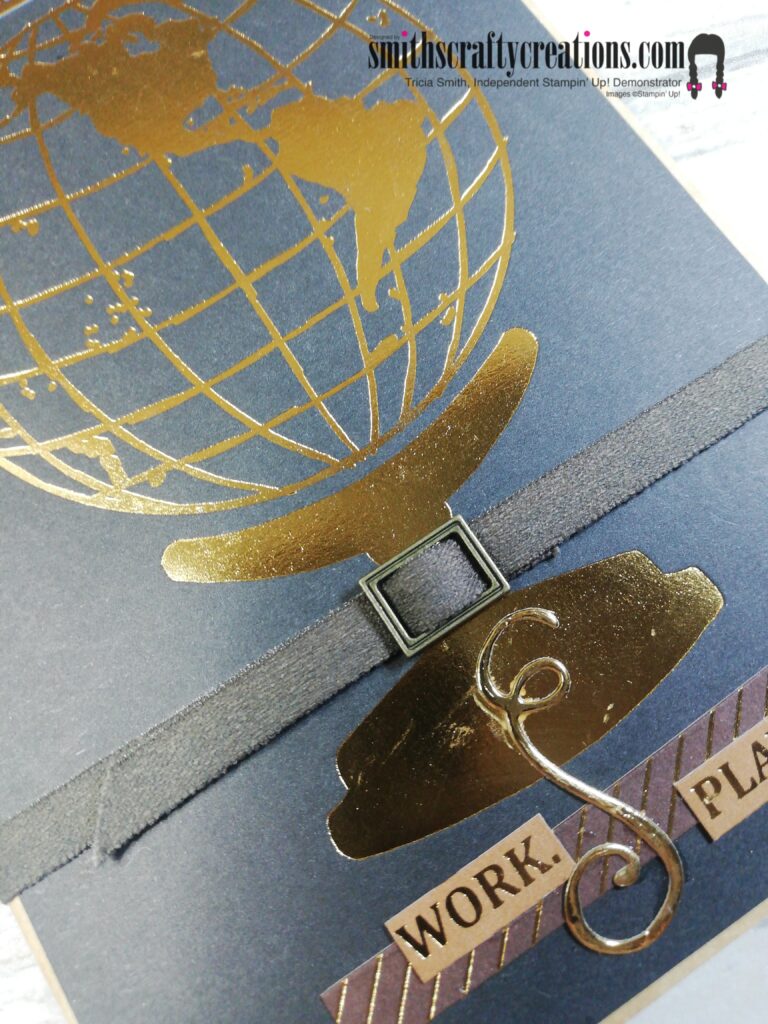
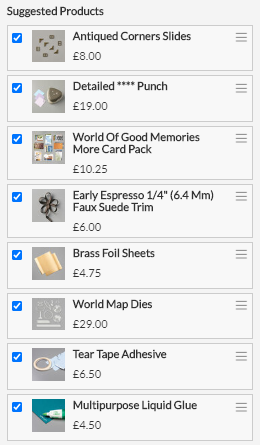
Personally, I have the full World of Good Suite, however, I only used some elements today on top of the memories and more card pack. I used the Faux Suede Trim, the Brass Foil Sheets, the Antique Corners and Slide Elements and also the World Map Dies. I also used the Detailed Trio Punch to round the corners of both the notebook and the pages.
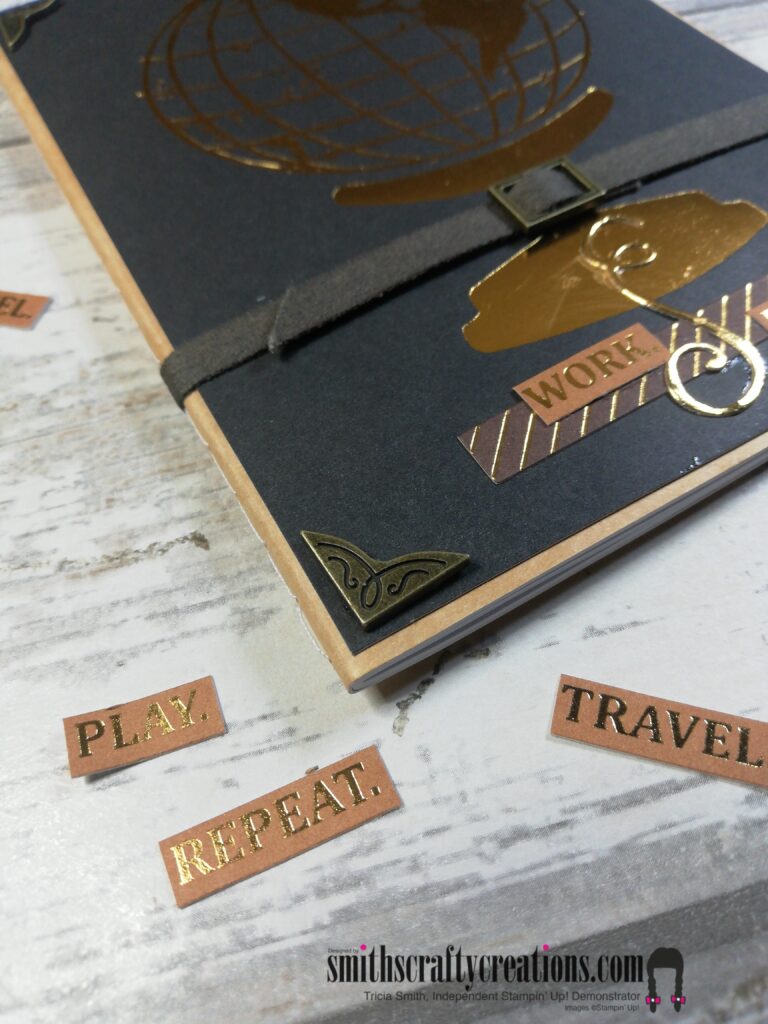
Here you can see clearer, some of the words that I fussy cut from one of the cards in the memories and more pack. There are over 100+ full words on one Card! Those antique corners and the slides are just stunning. Look at the little buckle fastener to keep this journal closed.
Products Used:
Quick link to all products here in my: Micro-site Link
Alternatively click on the image below:
Instructions
- Round the top right and bottom right corners of the covers and pages within the notebook for a smoother look using the Detailed Trio Punch
- Pick a Memories & More Card for the front and round the top right and bottom right corners.
- Adhere this to front of notebook.
- Measure out and adhere the Faux Suede Trim around the back of the book and half way across the front – not all the way as from the buckle centre section and towards the right, needs to be able to open up.
- Tuck in the remaining piece of trim in to the buckle and cut it down to a suitable length.
- For the back, pick another card and round the top left and bottom left corners. Adhere to back of notebook with both tear and tape.
- On the front of the notebook, using glue dots, stick down the two corners on the top left and bottom left section.
- Add stickers and die cut words from the card pack.
- Add your die cut swirls in desired location.
I’d love for you to pop over to my YouTube Channel and give me a little subscribe, a thumbs up, a comment and don’t forget to hit that bell to be notified of future video tutorials.

Looking for a hard copy of our new Mini Catalogue – why not Contact me for a free copy. I hope that you enjoyed this blog post and can take something away from today to try at home.
You can find all products in my online shop here:
www.smithscraftycreations.stampinup.net
Don’t forget to check out my Shop Now page, Customer Reward Page, Monthly Creative Crafting Kit Page and my Special Offers pages.
Don’t forget to subscribe to my YouTube Channel too www.youtube.com/smithscraftycreations