

November Challenge Blog Hop
My blog today is part of the November Challenge Blog Hop that I am taking part in today. I used the Boughs of Holly Designer Series Paper, our black 12 x 12 cardstock, crumb cake cardstock and co-ordinating inks.
I had fun making this box and card project today as not only was it perfect for this challenge, but perfect for festive packaging that is needed this month.
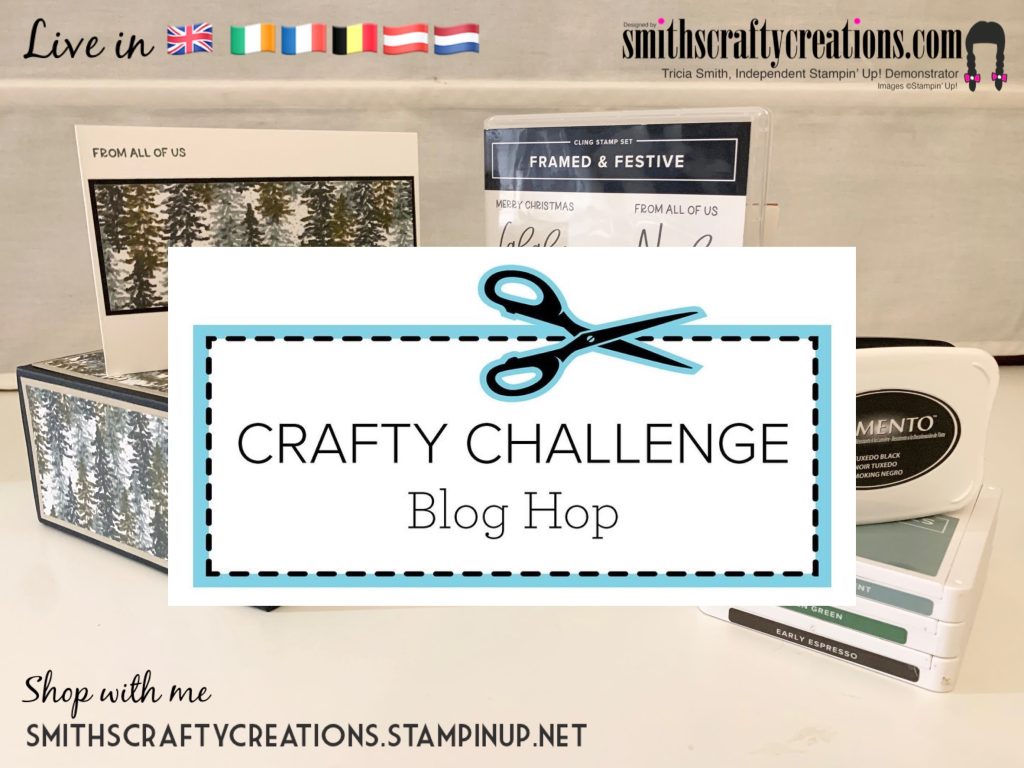
This is a 6″ x 3″ x 3″ reinforced lidded box. Perfect for gift giving this festive holiday season.
Project Measurements and Instructions
Box
You will need 12×12 cardstock, 12 x 12 piece of DSP, co-ordinating inks as per challenge instructions and basic crafting supplies.
- Box Base: score a piece of your 12 x 12 cardstock at 3″ on all four sides
- Box Lid: same as base but for your first two scores, move your cardstock a 16th of an inch away from your score guide before scoring. Score other two sides at 3″
Cutting
- Cut up one score line on each side to the point it meets the other score. This gives you four glue tabs. Take a wedge off of each side of your four tabs (this will reduce any potential overhang of card when glued together).
- Repeat on the other sheet.
Mats and Layers
- Lid and inside base: You will need two pieces of co-ordinating card cut down to 5-3/4″ x 5-3/4″ for the first mat. For the second mat cut co-ordinating DSP down to 5-1/2″ x 5-1/2″
- Box sides (Lid only): You will need four pieces of co-ordinating card cut down to 5-3/4″ x 2-3/4″ for the first mat. For the second mat cut co-ordinating DSP down to 5-1/2″ x 2-1/2″ (bear in mind direction of cutting if using directional DSP)
Construct your box
- Adhere your mat layers to a) inside box base b) top of box lid and c) sides of box lid (if you prefer to do this after you’ve constructed your box, then please do)
- I recommend using tear n tape and a little tombow glue to adhere your tabs to the sides of both your box base and box lid.

Card
- UK sizing: Cut a piece of basic white A4 cardstock down the longest side at 4-1/8″ to give you a C6 tent fold
- Take a piece of DSP left over from making the box and cut down to 5-1/2″ x 2-1/8″ and layer on to a piece of co-ordinating cardstock measuring 5-5/8″ x 2-1/4″
- Adhere this to your card (depending on pattern depends on whether your card will be horizontal or portrait)
- Stamp sentiment(s) of choice and add embellishments if you wish

Please visit the other blog hops in this months challenge:
Product List:

Spending £99+?
If you are spending £99 or more why not purchase the starter kit and join my team, and get an additional £31 spend to choose items in your starter kit 🙂 Contact me if you’d like more information or visit my team website www.SmithysStampers.co.uk
Starter Kit – what do you get?
Jumpstart your crafty journey or business with 175 € | £130 worth of products for just 129 € | £99 and we’ll throw in some FREE essential tools to help you share Stampin’ Up!’s amazing products and crafting community. We will also ship the kit to you for FREE!
WHAT YOU GET:
Select 175 € | £130 worth of Stampin’ Up! products to customise your Starter Kit!
Ordering Essentials
Take orders from your customers at your events using our forms or have your customers shop on our website and order directly from you.
• Customer Order Forms (pack of 50)
Are you a YouTube fan?
I’d love for you to pop over to my YouTube Channel and give me a little subscribe, a thumbs up, a comment and don’t forget to hit that bell to be notified of future video tutorials. Simply click the image below to be redirected to my channel.

Looking for a Catalogue?
Looking for a hard copy of our Annual or Mini Catalogue – why not Contact me for a free copy. Alternatively, click on either of the catalogues below to view digitally.
If you’re spending £99+ why not join my team
Start enjoying some discount on your favourite products by becoming a demonstrator today. Team Smithy and the #SmithysStampers would love to welcome you to join us. I know YOU will be GREAT.
We all started somewhere, let us be your somewhere. Let us share your journey.
What a great way to start your Stampin’ Up! business.
The Starter Kit is already a fantastic way for new Stampin’ Up! demonstrators to get loads of products at a huge value (for £99, choose £130 worth of products).
All decided to join? What to do next is click the image below and you will be redirected. Alternatively if you’d like an informal chat please reach out to me. Let’s see where your creativity will take YOU!
Check out the most frequently asked questions page by clicking “Join My Team” on the menu at the top of the screen.
Join My Facebook Group
Why not join us by clicking the image below. We have monthly challenges, lots of inspiration, project ideas and sharing and more. The best part is the friendships.
Don’t forget to check out my Shop Now page, Customer Reward Page, Monthly Creative Crafting Kit Page and my Special Offers pages.
I hope that you enjoyed this blog post and can take something away from today to try at home.
Thanks for visiting my November Challenge Blog Hop Blog Post

Beautiful boxed set!
Great little box and matching card Tricia, love this idea x
Amazing box! Perfect for the holidays!
What a great idea to have a box and card combo. They look awesome together.
What a great idea to have a coordinating box and cards – this looks amazing!
I really love that little box! Pretty card, too xx
Love the box. Great idea to gift the lovely cards.
Sweet box and love that you made a coordinating card too.