Stampin’ Up! Mini Cut & Emboss Machine Plate Sandwich Guide
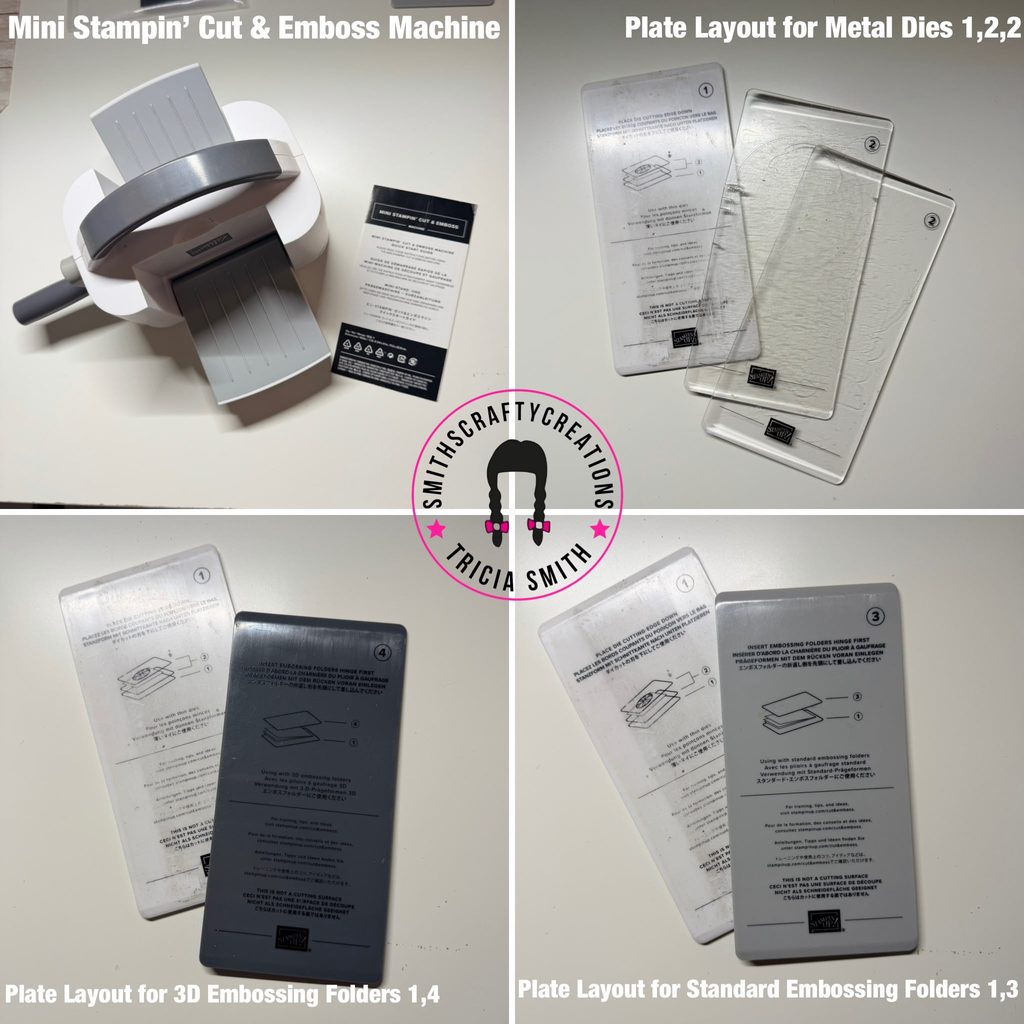
Have you ever looked at the plates for your Stampin’ Up! Mini Cut & Emboss Machine and wondered which ones you should use? You are definitely not alone!
When you are new to die cutting and embossing, all the different plates can feel a little confusing. However, the helpful numbers printed on them make creating the correct plate “sandwich” much easier.
Today, I’m sharing a simple guide to the three plate combinations you are most likely to use.
What Is a Plate Sandwich?
A plate sandwich is simply the order in which you stack the plates, cardstock, die or embossing folder before passing everything through your machine.
The combination you need will depend on whether you are:
Cutting with a metal die
Using a standard embossing folder
Using a 3D embossing folder
Thankfully, the plates are numbered, so you don’t need to remember lots of complicated instructions.
Plate Sandwich for Metal Dies: 1, 2 and 2
When using thin metal dies, you will need:
Plate 1 as your base
One clear Plate 2
Your cardstock and metal die
A second clear Plate 2 on top
Place your metal die with the cutting edge facing down towards the cardstock. Then, carefully roll the complete sandwich through your machine.
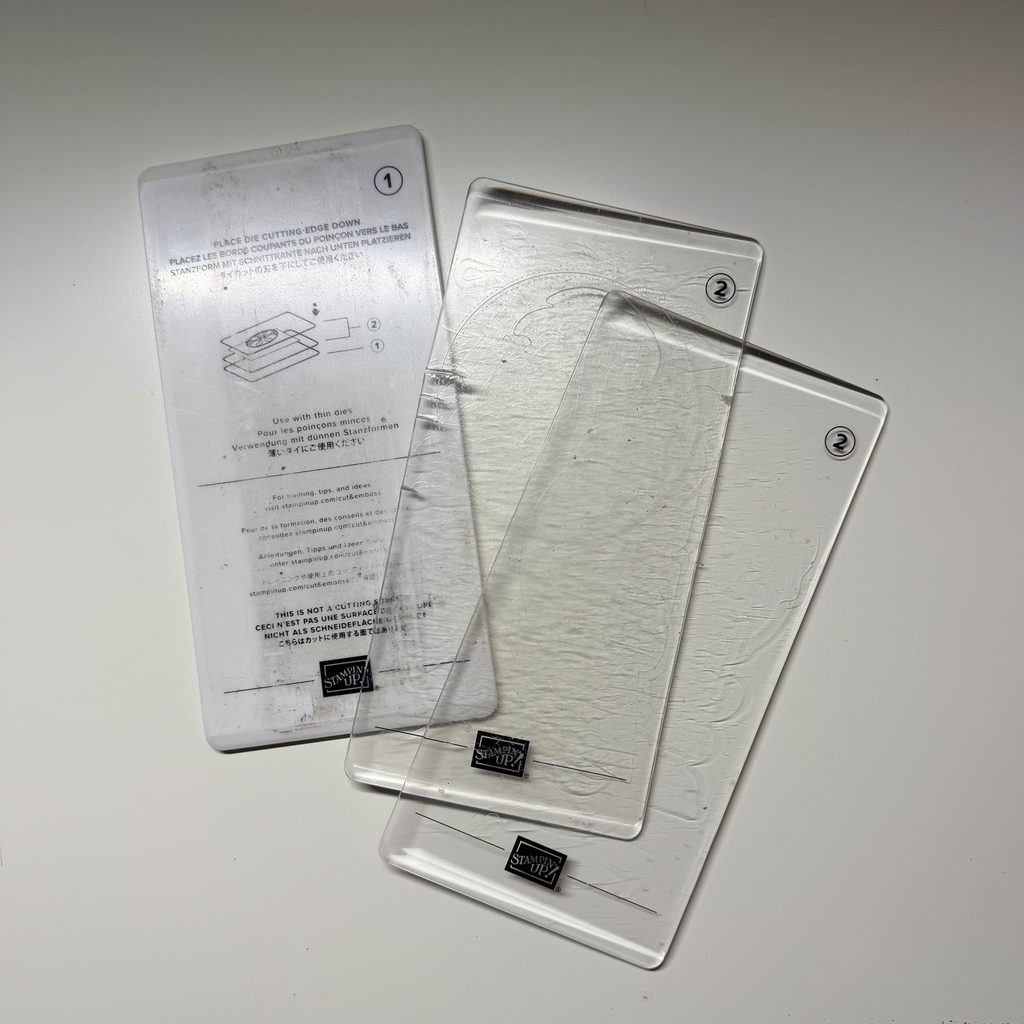
It is completely normal for the clear cutting plates to become scratched and marked with use. That simply shows they are doing their job!
Try alternating and turning your cutting plates regularly. This can help distribute the pressure and reduce excessive bowing.
Plate Sandwich for 3D Embossing Folders: 1 and 4
3D embossing folders create a deeper and more detailed impression. Therefore, they need a slightly different plate combination.
You will need:
Plate 1 as your base
Your cardstock inside the 3D embossing folder
Plate 4 on top
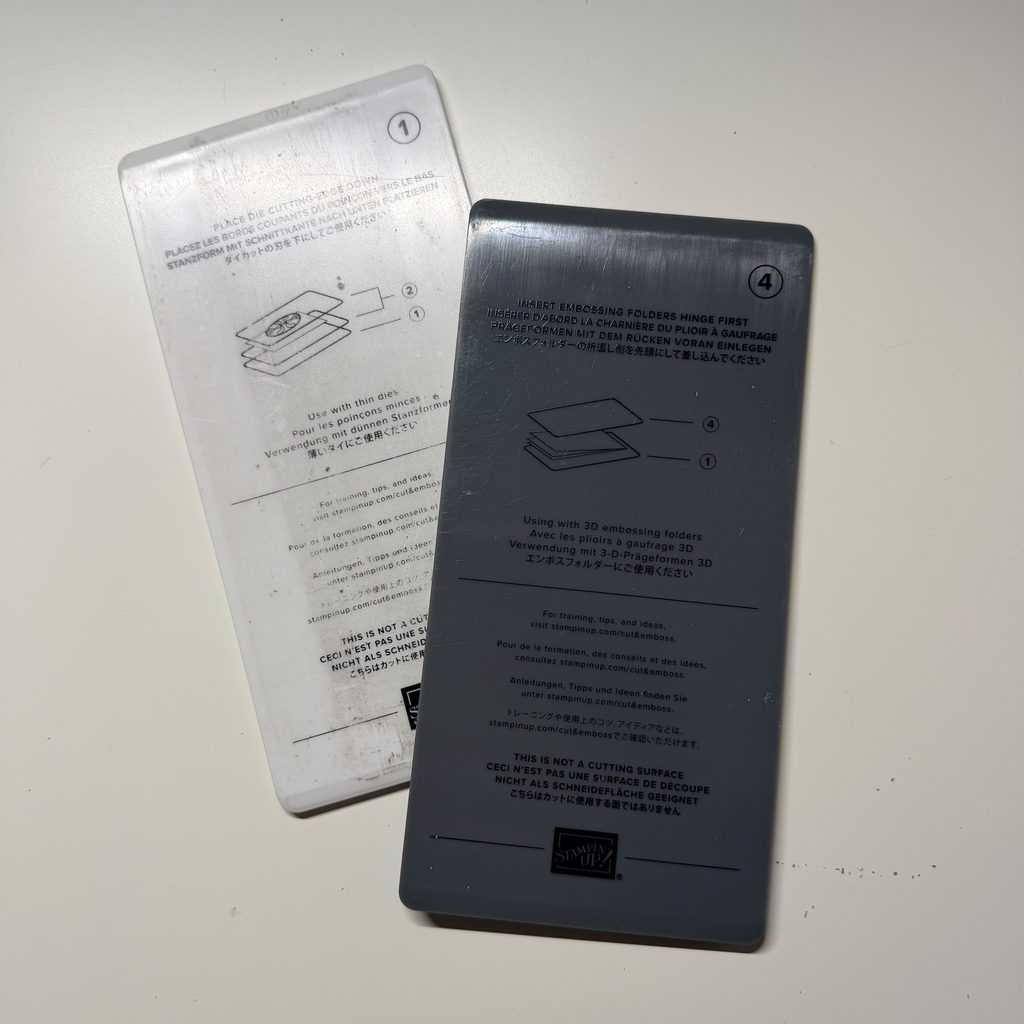
Feed the embossing folder into the machine with its hinged edge going through first. Then, turn the handle steadily and allow the machine to do the work.
There is no need to force the sandwich through. If it feels unusually tight, stop and check that you are using the correct plates.
Plate Sandwich for Standard Embossing Folders: 1 and 3
For a standard embossing folder, you will need:
Plate 1 as your base
Your cardstock inside the standard embossing folder
Plate 3 on top
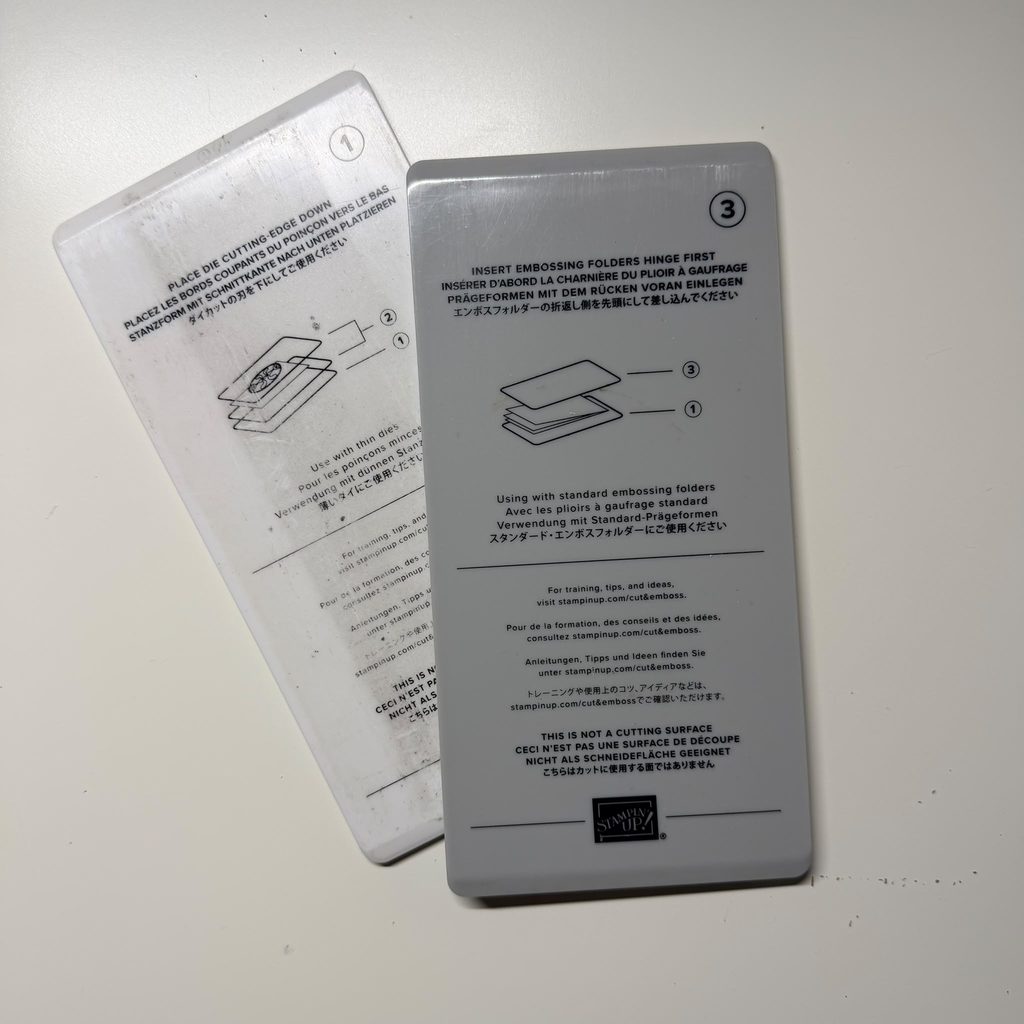
Again, place the hinged edge of the folder into the machine first. As you turn the handle, the pressure will transfer the folder’s pattern onto your cardstock.
Embossing is such an easy way to add texture and interest to a handmade card without needing lots of additional embellishments.
Quick Plate Sandwich Reference
Here is your easy reference guide:
- Metal dies: Plates 1, 2 and 2
- 3D embossing folders: Plates 1 and 4
- Standard embossing folders: Plates 1 and 3
Save or bookmark this post so you can quickly check the combinations whenever you are crafting.
A Few Helpful Tips
- Always check the numbers printed on your plates.
- Never use Plates 1, 3 or 4 as cutting surfaces.
- Insert embossing folders with the hinged edge first.
- Rotate and turn your clear cutting plates regularly.
- Do not force a sandwich through the machine if it feels too thick.
- Some marking and scratching on your clear cutting plates is completely normal.
- Most importantly, don’t worry about getting everything perfect straight away. There are no crafting police here! Take your time, check the plate numbers and enjoy discovering what your machine can do.
Ready to Start Creating?
The Mini Stampin’ Cut & Emboss Machine is a compact and useful tool for die cutting and embossing. Once you understand the plate combinations, it becomes much easier to use.
You can visit my Stampin’ Up! online shop to explore the latest crafting products, dies and embossing folders.
For more beginner-friendly inspiration, subscribe to my Smith’s Crafty Creations YouTube channel, where I share demonstrations, tutorials and creative ideas.
Don’t forget to bookmark my blog, follow me on social media and join my mailing list so you don’t miss any future tutorials or crafty news.
Happy crafting!
Tricia 💕
Smith’s Crafty Creations
Smith’s Crafty Creations
Creativity isn’t about perfection. It’s about relaxation, and making time for yourself.
#SmithsCraftyCreations #CouldCraftingBeYourNewThing #CardMakingForBeginners #PapercraftingForBeginners #NewHobby #CreativeHobbies #CardMakingUK #Papercrafting #TrySomethingNew #CreativeCommunity #StampinUp
🌸 Fancy Giving This Papercrafting a Try?
If you’re completely new to papercrafting, I’d love to help you get started. Follow my beginner series, join my crafty community, or get in touch and tell me “I’M NEW!”
💕 Follow the beginner series
👭 Join my crafty community
✂️ Find out about beginner classes
📧 Sign up to my newsletter
💕 Card Making for Beginners I need YOU
👭Card Making Basics
✂️How to Make Your First Handmade Card
Thank you everyone for checking out my blog post today.


