
I’ve been busy creating lots of handmade goodies for an upcoming Christmas craft fair, and today I’m sharing another lovely little project that’s quick, easy and perfect for batch making! 🎄☕ (P.s. YouTube tutorial linked at the bottom of blog post)
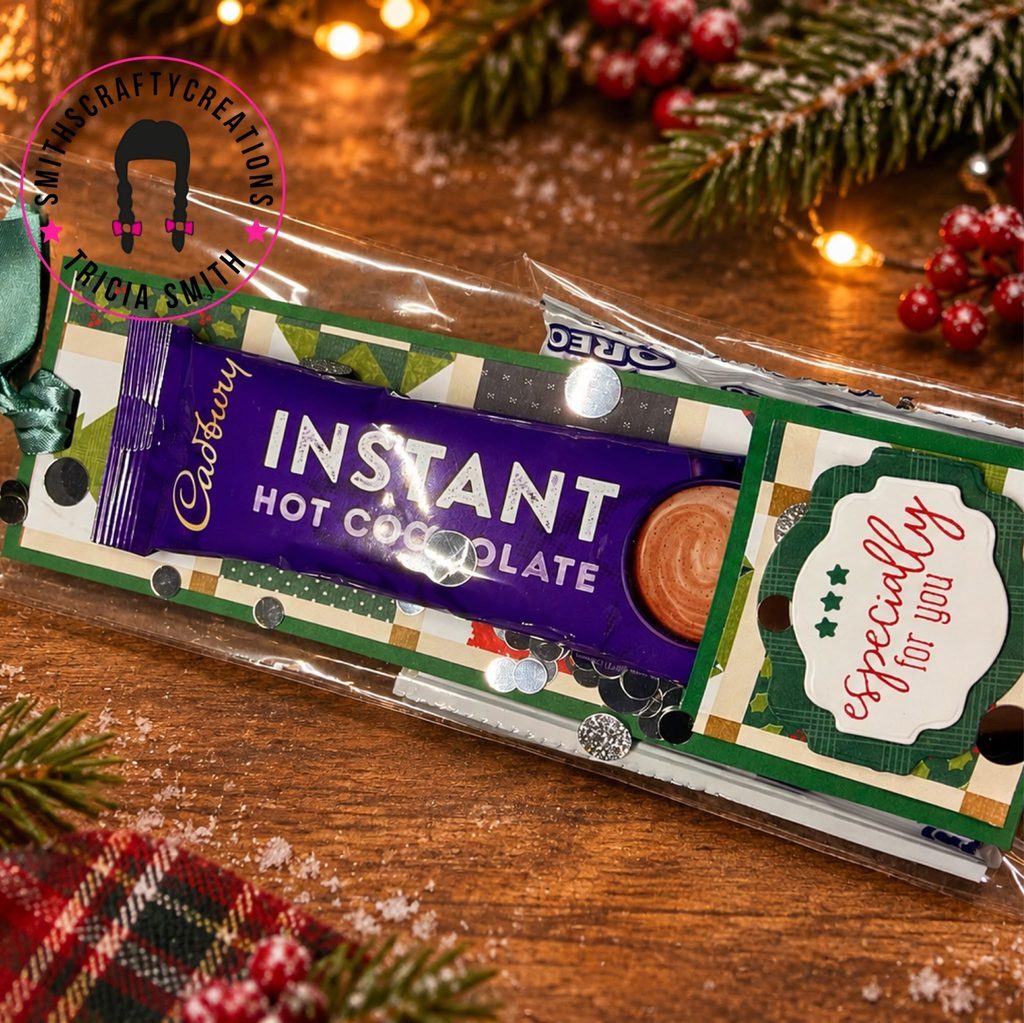
These cute Christmas Hot Chocolate & Oreo Treat Holders are such a simple idea, but I think they look really effective!
Each one contains a sachet of Cadbury’s Instant Hot Chocolate and a packet of Oreo Mini biscuits, beautifully presented using the gorgeous A Stitched Season Designer Series Paper (168223) from Stampin’ Up!
They’re perfect for Christmas craft fairs, stocking fillers, teacher gifts or simply giving someone a little festive treat.
And the best part? You don’t need lots of supplies or complicated techniques to make them!
A Little Christmas Treat – Especially for You!
For these holders, I’ve used the beautiful A Stitched Season Designer Series Paper from Stampin’ Up!
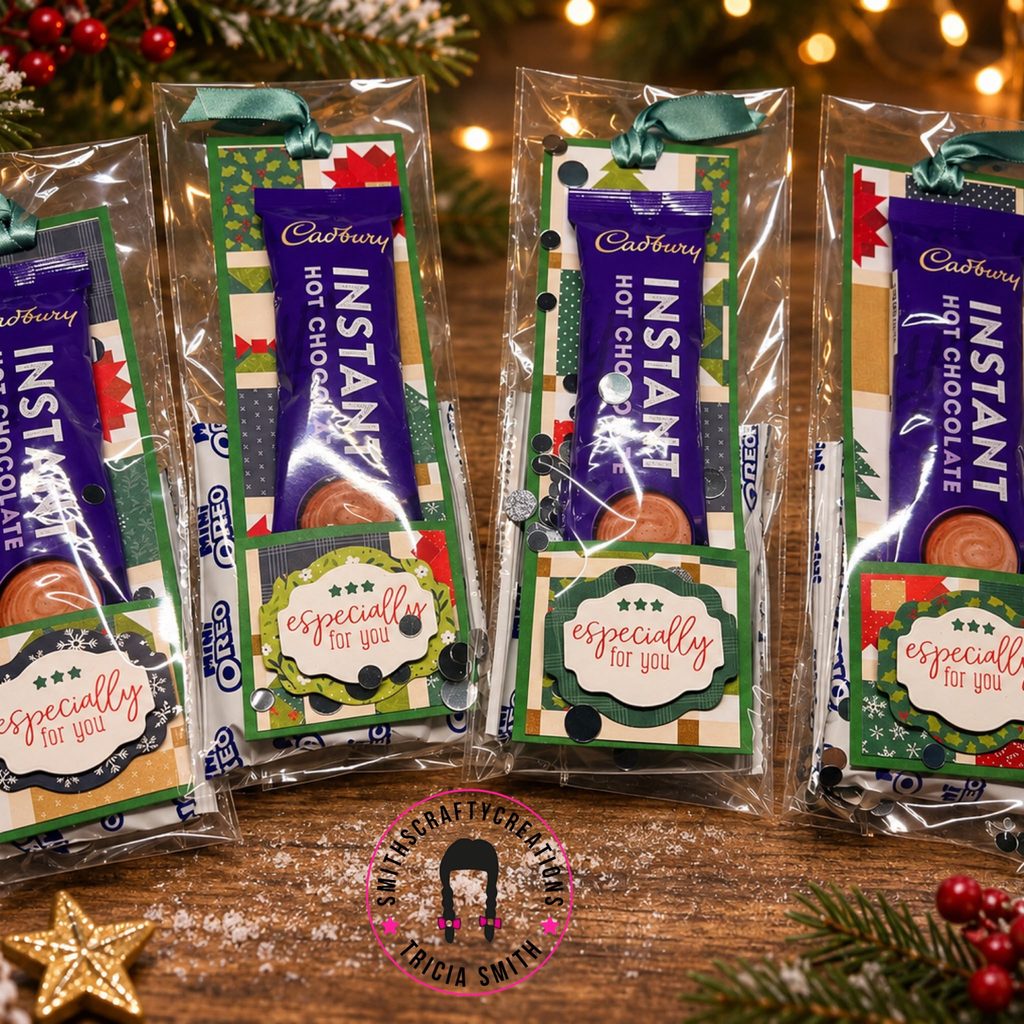
I really love the mixture of festive patterns and traditional Christmas colours in this collection. The greens, reds and coordinating designs work beautifully together, making it easy to create a selection of treat holders that all look slightly different.
I’ve teamed the patterned papers with green cardstock, a little retired ribbon from my stash and the Box of Joy Stamp & Die Bundle (168405).
The finishing touch is the lovely “Especially for You” sentiment, which makes these feel like a thoughtful little gift rather than just a packet of hot chocolate and biscuits!
Measurements – What You’ll Need
These are the exact measurements I used for my project.
Cardstock Base
- Cut one piece measuring 10″ x 2½”
- Score at 7¾” along the long side
A Stitched Season Designer Series Paper (168223)
- One piece measuring 2¼” x 5¾”
- One piece measuring 2¼” x 2″
Stampin’ Up! Supplies
- A Stitched Season Designer Series Paper – 168223
- Hole Punch Assortment – 165409
- Mini Glue Dots – 103683
- Tear & Tape Adhesive – 154031
- Box of Joy Stamp & Die Bundle – 168405
- Basic White Cardstock – 166781
- Coordinating green cardstock
- Retired ribbon from my stash
- Ink for stamping
Other Supplies
- Cadbury’s Instant Hot Chocolate sachet
- Oreo Mini biscuits
- 5″ x 7″ clear cellophane bag
- Sequins for decoration
- Paper trimmer and scoring tool
- Die-cutting machine
Step-by-Step Instructions
Step 1 – Prepare Your Cardstock Base
Start by cutting your cardstock to 10″ x 2½”.
Using your scoring tool, score the long side at 7¾”.
Fold and burnish along the score line to create the smaller section at the bottom of your holder.
This little flap will fold upwards to help secure the hot chocolate sachet.
Step 2 – Punch Your Ribbon Opening
Next, I used the Hole Punch Assortment (165409) to punch a section at the top of the cardstock.
This trio of punches is really handy for creating decorative openings for ribbons and tags.
Once the opening was punched, I threaded through some coordinating green ribbon.
I’ve used retired Stampin’ Up! ribbon for my projects, which is a great way of using up those lovely supplies we already have tucked away in our craft rooms!
Step 3 – Add Your A Stitched Season Designer Series Paper
Now it’s time to decorate!
Cut your A Stitched Season DSP to the following measurements:
- 2¼” x 5¾” for the main section
- 2¼” x 2″ for the smaller folded section
Adhere the larger piece to the front of your cardstock base and the smaller piece to the folded flap.
I used a mixture of patterns from the A Stitched Season collection, giving each holder a slightly different look.
This is a brilliant way to use coordinating paper designs and create a lovely collection of gifts for your craft fair table.
Step 4 – Attach Your Hot Chocolate Sachet
Position your Cadbury’s Instant Hot Chocolate sachet on the decorated cardstock.
I used Mini Glue Dots (103683) to attach mine.
These are ideal for holding lightweight items neatly in place.
Next, fold the smaller section of cardstock upwards and secure it using Tear & Tape Adhesive (154031).
This creates a lovely little holder for the hot chocolate sachet.
Step 5 – Stamp and Die Cut Your Sentiment
For the sentiment, I used the Box of Joy Stamp & Die Bundle (168405).
I stamped the words “Especially for You” onto Basic White Cardstock (166781).
I then used the middle-sized label die from the bundle to cut out the stamped sentiment.
Using the largest label die, I cut a coordinating piece of A Stitched Season Designer Series Paper.
I layered the white stamped label onto the patterned paper die cut to create a lovely decorative finish.
I really like how the coordinating papers frame the sentiment and bring everything together.
Attach your completed sentiment to the front of the folded flap.
Step 6 – Add Your Oreo Mini Biscuits
To make these into a lovely little Christmas treat, I added a packet of Oreo Mini biscuits to the back of each holder.
I think hot chocolate and biscuits make such a cosy combination, especially during the colder winter months!
It’s a simple way to turn a little papercraft project into a thoughtful handmade gift.
Step 7 – Package and Add Some Sparkle!
Once everything was assembled, I placed each completed holder into a 5″ x 7″ clear cellophane bag.
I added a few sequins inside the packaging for a little extra festive sparkle.
The clear bags are great because they keep everything together while allowing all that lovely A Stitched Season patterned paper to be seen.
And that’s it!
A cute, handmade Christmas treat ready for gifting or displaying at a craft fair.
Why These Are Perfect for Christmas Craft Fairs
I’ve been spending lots of time preparing for my upcoming craft fair, and projects like these are always lovely to have on the table.
Not everyone wants to spend a lot of money, so having a selection of smaller gifts is a great idea.
These treat holders are particularly handy because:
- They’re quick and easy to make in batches.
- They only require a small amount of cardstock and Designer Series Paper.
- They’re a lovely way to use up smaller pieces of DSP.
- They look attractive when packaged.
- They’re lightweight and easy to transport.
- They make lovely inexpensive Christmas gifts.
I think a basket filled with these little treats would look lovely on a Christmas craft fair stall!
A little craft fair tip: If you’re selling treats containing food, keep the original packaging sealed and ensure the ingredients, allergen information and best-before dates remain available to customers. It’s also worth checking any food-selling requirements that apply to your event.
Make Them for Other Occasions
Although I’ve made these for Christmas using A Stitched Season DSP, you could easily change the patterned papers and sentiments to create little gifts for other occasions.
They’d be lovely for:
- Teacher thank-you gifts
- Birthday treats
- Winter care packages
- Work colleagues
- Fundraising events
- Random acts of kindness
Simply change your Designer Series Paper and sentiment to suit the occasion.
That’s one of the things I love most about papercrafting – once you have a design you enjoy making, there are so many ways to adapt it!
A Little Update from My Craft Room
My craft room has been a busy place lately as I’ve been making lots of little goodies for my upcoming craft fair.
I’ve really enjoyed coming up with ideas that are practical, affordable and lovely to give as gifts.
From handmade gift boxes to festive treat holders, it’s amazing what you can create with cardstock, pretty papers and a little imagination.
And I have to say, seeing all the finished projects lined up and ready to go is so satisfying!
If you’re preparing for a craft fair yourself, I’d definitely recommend giving these little hot chocolate holders a try.
They’re easy to batch make, and you can have so much fun mixing and matching the A Stitched Season paper designs.
Have a Go Yourself!
I hope this little project has given you some inspiration for your own Christmas crafting.
Whether you’re an experienced papercrafter or just starting out, these treat holders are a lovely project to try.
Remember, crafting doesn’t need to be complicated to be enjoyable.
Sometimes it’s the simplest ideas that make the loveliest gifts!
I’d love to know – do you enjoy making little gifts for craft fairs, or do you prefer creating handmade cards?
Leave me a comment below and let me know!
Shop the Supplies
If you’d like to recreate this project, you can browse my Stampin’ Up! online shop for beautiful Designer Series Papers, cardstock, stamps, dies and adhesives.
Stampin’ Up! products featured in this project:
- A Stitched Season Designer Series Paper – 168223
- Box of Joy Stamp & Die Bundle – 168405
- Hole Punch Assortment – 165409
- Basic White Cardstock – 166781
- Mini Glue Dots – 103683
- Tear & Tape Adhesive – 154031
Product availability may vary.
🛍️ Shop Stampin’ Up! with me:
https://smithscraftycreations.stampinup.net
And don’t forget to explore more Christmas craft fair ideas and handmade gift projects here on my blog.
Got a question? Feel free to message or email me! 💕
There really is no such thing as a silly question, especially when you’re learning something completely new.
📩 Email me at Smithscraftycreations@gmail.com or send me a message through my social media pages.
I’m more than happy to help you get started, explain the basics or point you in the right direction.And your first handmade card could be the beginning of something rather lovely.
Happy crafting!
Tricia 💕
Smith’s Crafty Creations
Smith’s Crafty Creations
Creativity isn’t about perfection. It’s about relaxation, and making time for yourself.
#SmithsCraftyCreations #CouldCraftingBeYourNewThing #CardMakingForBeginners #PapercraftingForBeginners #NewHobby #CreativeHobbies #CardMakingUK #Papercrafting #TrySomethingNew #CreativeCommunity #StampinUp
🌸 Fancy Giving This Papercrafting a Try?
If you’re completely new to papercrafting, I’d love to help you get started. Follow my beginner series, join my crafty community, or get in touch and tell me “I’M NEW!”
💕 Follow the beginner series
👭 Join my crafty community
✂️ Find out about beginner classes
📧 Sign up to my newsletter
💕 Card Making for Beginners I need YOU
👭Card Making Basics
✂️How to Make Your First Handmade Card
Thanks so much for popping by my crafty corner of the internet.
Watch my live demonstration replay over on YouTube here:


