Handmade Gift Card Holder using Stampin’ Up! Products
Free Step by Step Guide on how to make a handmade gift card holder
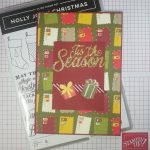
Thank you for visiting the blog today – today we are learning how to make this handmade gift card holder in the shape of a standard A6 card using the Night Before Christmas Suite by Stampin’ Up!
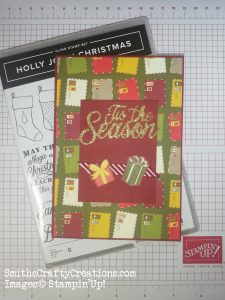
I really love the vintage feel of this suite and have used it over and over again and never been disappointed with the outcome. In fact, I plan to show my craft class ladies how to make these at my next class.
Instructions and Measurements
Card Base
Cut a piece of A4 cardstock along the longest side down to your desired card height. I cut mine at 5 7/8″
Score at 4 1/8″ and 8 2/8″
On the third panel cut away section to form card holder.
Card Layers
DSP layer for front measures 4″ x 5 3/4″ as do the two very vanilla layers for the inside.
Utilise the DSP segments that you have left to make a layered section on the inner front cover of your card.
Adhere the gift card flap down on the left and bottom sections only.
Decoration
Stamp and decorate to your liking.
Products Used
") 153470 153470 |
 106550 106550 |
 121681 121681 |
 147083 147083 |
 147087 147087 |
 147111 147111 |
I hope that you have enjoyed my tutorial today, please view Youtube video below for full tutorial.
You Tube Tutorial – Handmade Gift Card Holder Stampin’ Up! 2019
Please remember to like, comment, share and subscribe (don’t forget that alert bell too!) thank you