

Welcome to today’s blog featuring the Peaceful poppies suite using some die cut elements to make this lovely thank you card
Hi and welcome to a little bonus project for you today – using the lovely peaceful poppies to make a thank you card. I made this card to use up the spare die cut elements from a previous project. I hope you like it – it’s a busy card but still beautiful.
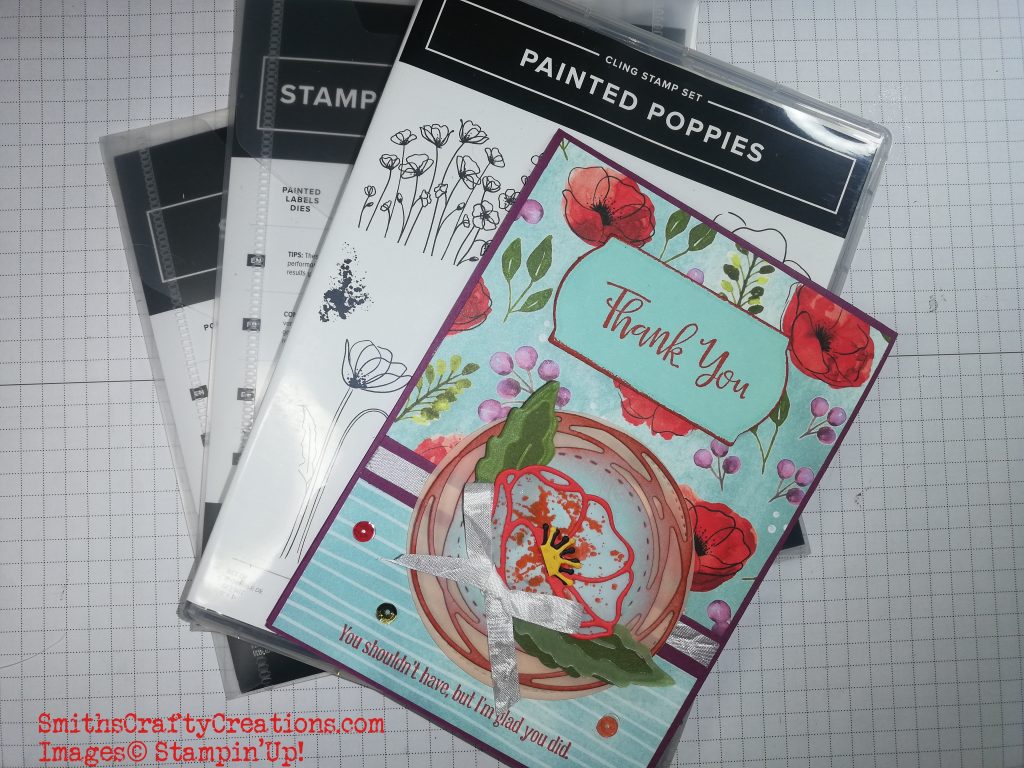
I absolutely love every part of this suite.

I decided to use Rich Razzleberry for the card base and also added some velum too,.

Isn’t this set just gorgeous! – I can’t stop playing with it. Here is the previous card I made too just in case you missed it.

My Youtube channel is via the link below – I’d love for you to pop over to subscribe and watch this premiere with us.

I hope you like today’s project.
Looking for a hard copy of our new Mini Catalogue – why not Contact me for a free copy.
Instructions and Measurements:
Card Base and Layers
Card base is 5 7/8″ x 4 1/8″
DSP layer is 5 3/8 x 3 7/8 cut at your desired size, flip the bottom part over to use reverse print
Thank you so much for taking the time to visit my blog today.
Products Used:
Thank you so much for visiting me today. I hope that you enjoyed this project and can take something away from today to try at home.
Product List")


 Vellum Cardstock")

You can find all products in my online shop here:
www.smithscraftycreations.stampinup.net
YouTube Tutorial – Peaceful Poppies Suite Thank you Card
Don’t forget to check out my Shop Now page, Customer Reward Page, Monthly Creative Crafting Kit Page and my Special Offers pages.
Don’t forget to subscribe to my YouTube Channel too www.youtube.com/smithscraftycreations