

Welcome to today’s blog showcasing an array of tones to stamp your own background
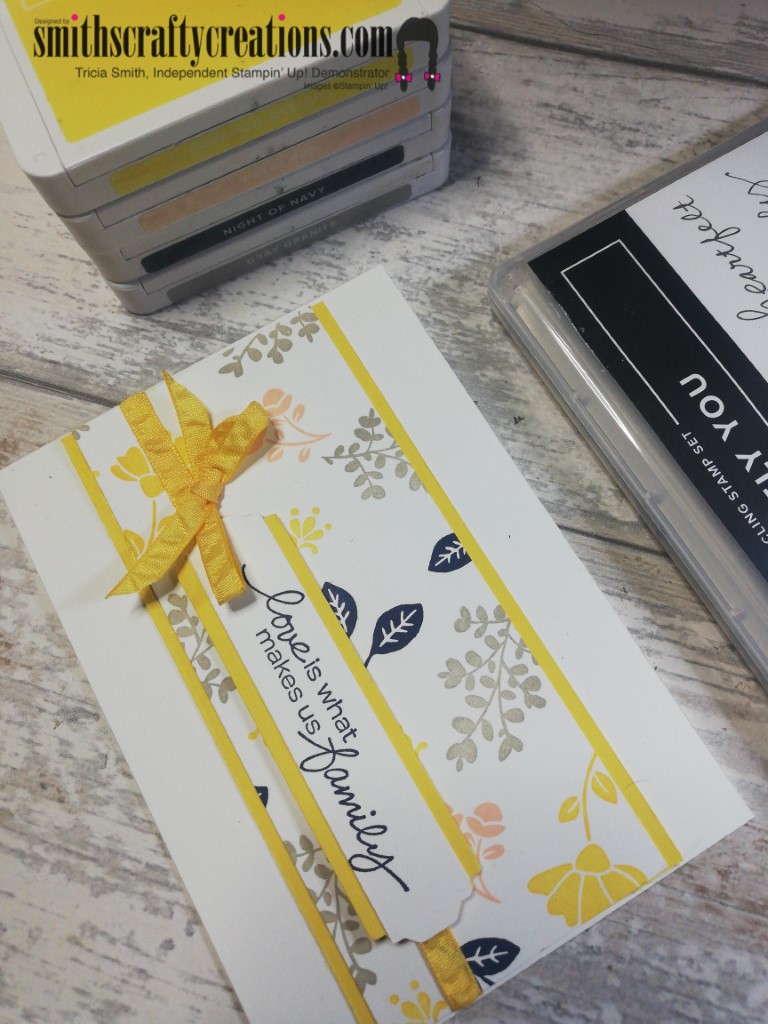
Hi and welcome to my blog. Today’s card is a hand stamped card with an array of different tones. Why not try this and stamp your own background.

Colour choices today were: Petal Pink, Night of Navy, Daffodil Delight and Gray Granite. My main colour choice for the card is Daffodil Delight, one of my favourite yellow tones. It is such a bright, colourful tone.
The clear crisp images from our Cling Red Rubber Stamps makes for an easy stamping experience, even for beginners. By purchasing the bundle you can save 10%.
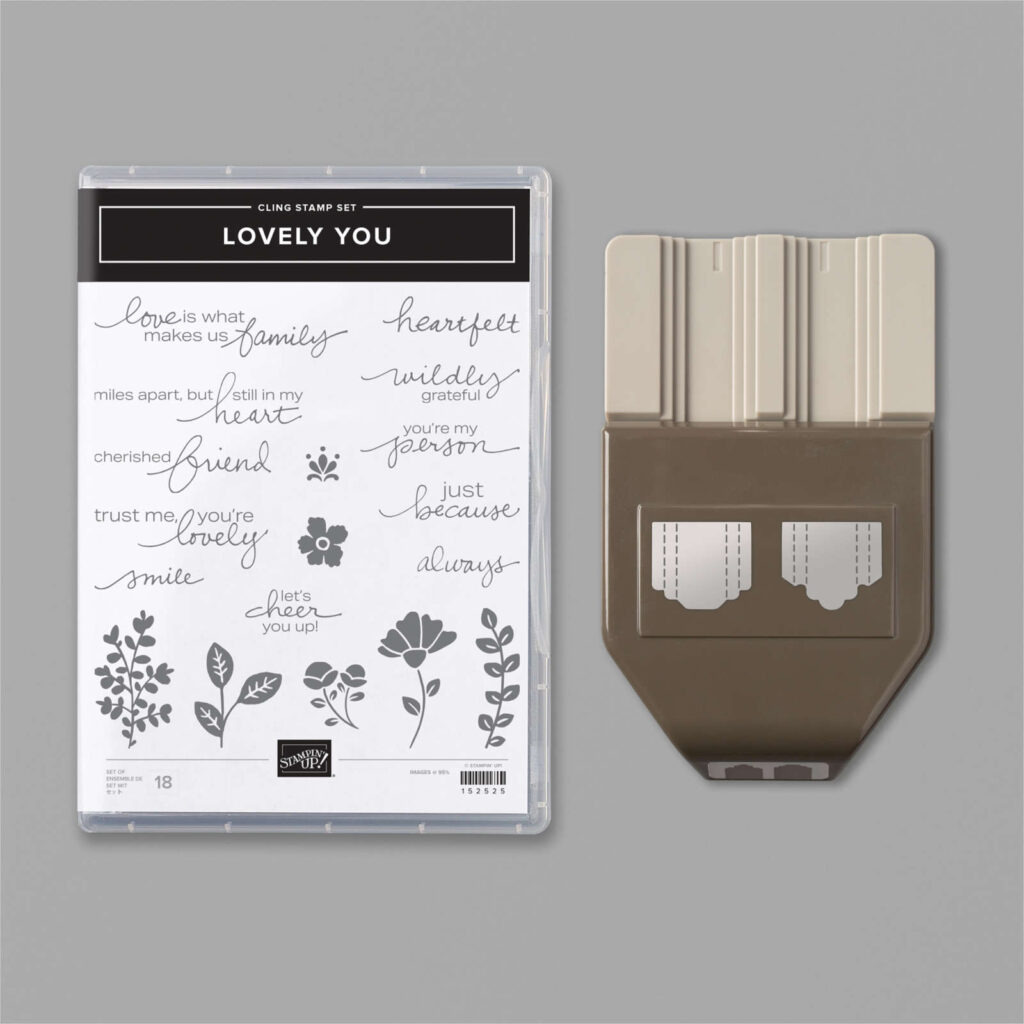
Eleven sentiments and seven image stamps makes the possibilities endless for card making with this set.
Toward the bottom of this page I have linked all the products used today in one handy link.
Ribbon used today is called Daffodil Delight Ruched Ribbon and is 1/4″ thick by 10 years (9.1 meters) in length.

Deciding to use this design for the basis of my most recent Online Coffee and Cards LIVE card making over on my Facebook Page here was an easy choice.
Instructions
Card Base is Whisper White and Measures 4 1/8″ x 5 7/8″
Whisper White Stamping Layer is 2 1/2″ x 5 3/4″ which was cut from the A4 sheet of hand stamped images.
I layered the stamping layer at the top and bottom with some daffodil delight x2 strips of card stock (use your scrap stash) and these measure 1/2″ x 5 3/4″, the same length as stamped section.
I added a strip of daffodil delight rouched ribbon on my stamping layer too, my next section, my sentiment layer will go directly on top of this. Adhere this section to the card base.
Sentiment layers:
Bottom Layer, Daffodil Delight Card Stock 1″ x 4″, punch each end with the Lovely Labels Pick a Punch
Top Stamping Layer, Whisper White card stock 3/4″ x 4″, punched at each end with the Lovely Labels Pick a Punch.
Sentiment section, choose and stamp the sentiment of your choice on to the whisper white and adhere to layer 1.
Add dimensions and adhere on top of your ribbon section, towards the left or right side, to allow room to add the bow.
Add bow to left or right side of card.
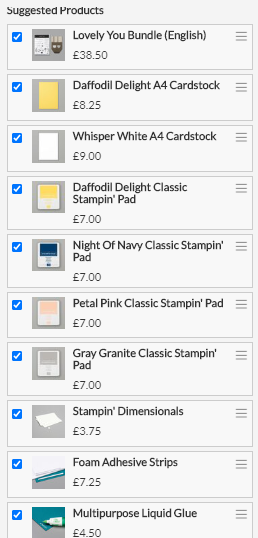
Products Used:
Quick link to all products here in my: Micro-site Link
Alternatively click on the image below:
I’d love for you to pop over to my YouTube Channel and give me a little subscribe, a thumbs up, a comment and don’t forget to hit that bell to be notified of future video tutorials.

YouTube Tutorial: An array of tones stamp your own background
Looking for a hard copy of our new Mini Catalogue – why not Contact me for a free copy. I hope that you enjoyed this blog post and can take something away from today to try at home.
You can find all products in my online shop here:
www.smithscraftycreations.stampinup.net
Don’t forget to check out my Shop Now page, Customer Reward Page, Monthly Creative Crafting Kit Page and my Special Offers pages.
Don’t forget to subscribe to my YouTube Channel too www.youtube.com/smithscraftycreations